Expert advice on how to paint a house, including DIY tips for buying paint, preparing exterior surfaces, and using a power paint sprayer.
Are you thinking about repainting your home’s exterior? Here are seven tips that will make your house painting work easier, safer, and more likely to produce pride-inspiring results.
1. Evaluate doing the painting yourself
Painting is one of those jobs that requires only a moderate level of skill and a few basic tools. By doing the work yourself, you can usually save more than half the cost of the job. But should you do the work yourself? That depends on a number of factors, including your experience, fitness, available time, and the difficulty of working on your home’s exterior walls.
2. Buy quality paint
Choosing high-quality paint is critical to achieving a long-lasting paint job and can also make the work far easier. Not only will quality paint weather the years durably, but it is also easier to maintain, and it covers the walls more quickly and easily. Just think about the effort and expense of painting your house-this should make it clear that you don’t want to have to do the job again in four or five years.
3. Repair & prepare the surfaces
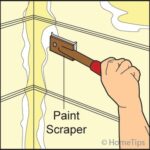
Even high-quality paint won’t guarantee a lasting paint job if you don’t prepare the surfaces properly. Start by repairing damaged siding. Peeling, blistering, wrinkling, and flaking paint must be removed from wood siding by scraping and sanding, ideally with a power sander. Be advised that this is difficult, tiring work, and you must do it carefully so as not to gouge the wood. Always wear a dust mask, gloves, and protective goggles.
4. Mask off areas where you don’t want paint
Avoid getting paint on roofing and other unwanted surfaces by masking with plastic sheeting and 3-inch masking tape. Use dropcloths to protect walkways, shrubs, and other surfaces from dripping paint. You’ll be painting the siding first and then the trim; after the siding is painted and dry, mask the siding around the trim. Be sure to remove the masking tape immediately after painting, before it has a chance to form a stubborn bond.
5. Paint surfaces from the top down
Begin with the gutters, fascia, and eaves and work your way down the main surfaces, painting in 3- to 4-foot-square sections. Use a high-quality 4-inch brush. If your home has lap siding, first draw the bristles along the bottom edges of three or four boards and then paint the surfaces in line with the boards. Regularly check for and correct drips and streaks; they are much more difficult to clean up after the paint dries.
6. Paint trim in the proper order
Use a 2-inch angled trim brush to paint trim, always working in line with the wood’s grain. With a window, begin with the muntins and then paint the stiles, rails, head casing, side casings, and sill.
Sometimes it’s easiest to remove a door and paint it on sawhorses. Otherwise, just paint it in place over a dropcloth. Start with the inset panels, panel moldings and recesses, horizontal rails, and then vertical stiles and mullion.
When painting along glass, don’t bother to mask it if you have a steady hand. Just let the paint lap onto the glass by about 1/16 inch and then remove the wet paint from the glass with a rag wrapped around the end of a putty knife. Use a razor blade to remove any residual paint after it has dried.
7. Clean up properly
Use soap and water for latex paints and paint thinner for alkyd paints to thoroughly clean your brushes and gear right after painting. Don’t pour paint thinner or excess paint down the drain or onto the ground as this is a serious source of ground-water pollution. Keep it in an old sealed paint can and dispose of it at a toxic-waste collection site.


 Don Vandervort writes or edits every article at HomeTips. Don has:


