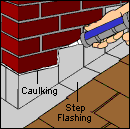
A diagram and helpful explanation on how chimney flashing, step flashing, and other types of roof flashing protect a roof from leaks.
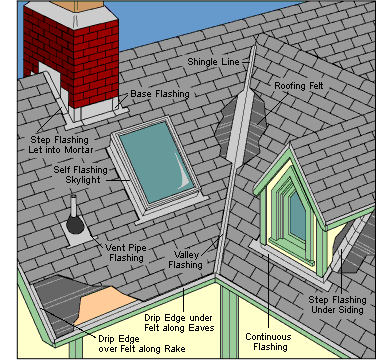
Some parts of roofs and exterior walls are particularly prone to leaks and water damage. These include roof valleys, the intersection between a dormer wall and the roof surface, and chimney and skylight perimeters—nearly anywhere runoff is heavy or where two opposing surfaces meet. These areas require the extra protection that flashing provides.
Although roof flashing is occasionally fabricated from plastic, roofing felt, or rubber, it is usually made of rust- resistant metal—galvanized steel, aluminum, or copper. Galvanized sheet metal is most common, but aluminum and copper find occasional use in specialty situations. Aluminum flashing is very popular for do-it-yourself installation because it’s easy to bend. Copper flashing is usually custom fabricated for use with copper roofs.
Flashing is formed and, in some cases, soldered into various shapes, depending upon the job it must do. Following are the main types of roof flashing:
Chimney flashing is applied around the base of a chimney in several parts—continuous flashing along the bottom, step flashing up the sides, and saddle flashing at the top. Cap flashing, mortared or caulked into the chimney, laps over the top edges of the other flashings to prevent water from running behind them.
Continuous flashing protects the joint between a vertical wall and a sloped roof.
Drip edges prevent water from seeping under roofing along the edges of rakes and eaves. They’re applied under roofing felt along eaves and over roofing felt along rakes.
Skylights often have their own integral flashing. Otherwise, their curbs are flashed with continuous flashing along the base, step flashing up the sides, and saddle flashing across the top.
Step flashing steps up a roof to protect where the roof meets the side walls of dormers, chimneys, and some skylights. It consists of a series of right-angled metal pieces; each section is worked into a course of shingles so that it overlaps the section beneath it. The flashing’s vertical edge is usually tucked under siding or capped with a second counter flashing that is mortared into the chimney or caulked along a skylight so water can’t sneak in behind it.
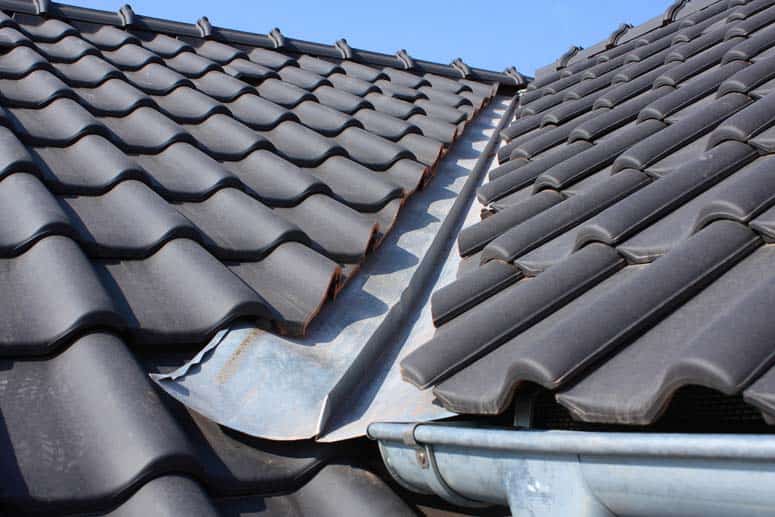
Valley flashing protects the valleys where two roof planes meet. This W-shaped channel is placed over the top of building felt before the roof’s finishing material is installed.
Vent pipe flashing fits over flues and pipes. It is cone-shaped with a flange at the base, which is worked into the shingles as the roofing is applied.





 Don Vandervort writes or edits every article at HomeTips. Don has:
