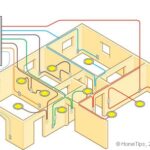
Making sure that electrical wires are safely secured and protected will keep your home safe.
Most local codes require that exposed wires be contained within conduit, and for good reason. Electrical wiring can pose a serious fire risk if the wires are damaged or cut. Loose wires also run the risk of being tugged or pulled from their connectors or outlet box.
There are three common kinds of conduit, each requiring a different installation technique: thinwall metal conduit (type EMT), flexible conduit (also called just “flex,” or Greenfield), and nonmetallic conduit (PVC).
Before beginning the actual wiring, you must install the entire conduit system. Planning ahead is a must because you want as direct and straight a route as you can achieve.
Choosing the right kind of electrical conduit for a particular job is key to a successful installation. It will not only minimize the likelihood of future repairs but also reduce the difficulty of the repair should problems arise. Following is a closer look at the three main types of conduit and how to install them.
Installing Thinwall Metal Conduit
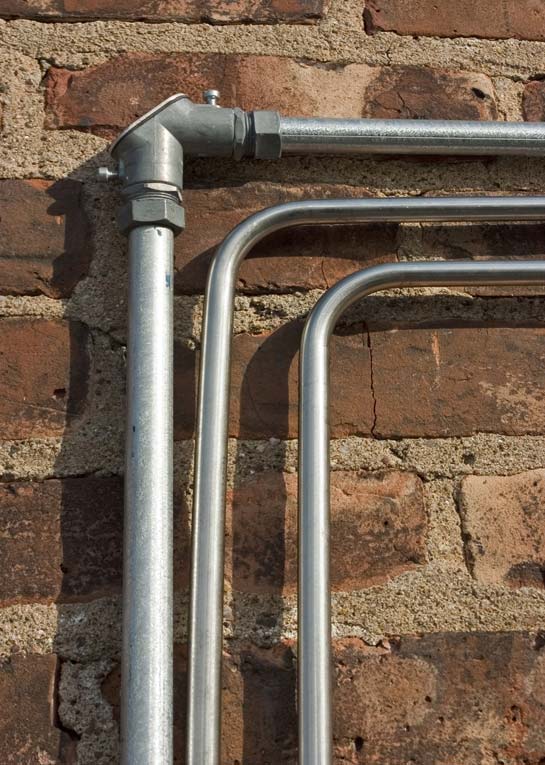
In any room where aesthetics are not an issue, such as an unfinished basement or garage, EMT is a good choice to enclose exposed wiring. You will need to determine the correct size conduit based on the number of wires you will be pulling through (see the chart in Electrical Conduit for guidelines). At the same time, keep in mind that pulling wires through a larger conduit than may be necessary will make the job easier.
When creating a conduit system, you will be cutting, coupling, and bending conduit to follow the route you have planned. EMT can be bent with a conduit bender, though you might opt to buy conduit and fittings that are pre-bent, which will cut down on your labor.
EMT requires metal housing boxes, which can be attached to walls or ceilings. Use panhead wood screws for wood framing; however, use masonry screws or expanding anchors for concrete, brick, or block.
Cutting & reaming conduit. EMT can be cut using a tubing cutter or a simple hacksaw. After cutting, be sure to “ream,” or smooth, the edges with a round metal file. If you don’t, burrs or ragged edges could damage the conductors.
Conduit routing logistics. If the simplest route you can plan still contains more than a total of 360 degrees in bends, installing a pull box in a central location (and definitely at a T intersection where a conduit splits in two) will help ease the wires through the route. After the wires are pulled, add a faceplate to conceal the exposed wires. If you don’t have the need for a pull box, simply use corner elbows.
Conduit straps should be used to anchor EMT 3 feet from a pull box and no more than every 10 feet elsewhere in the run. Depending on the surface to which the conduit is being mounted, use the appropriate fastening devices.
Making conduit connections. Sections of EMT can be joined using threadless setscrew couplings. End pieces of conduit slip inside either end of the coupling and are tightened down with setscrews. Elbow fittings come with their own dedicated setscrews.
Joining conduit to boxes. With indoor applications, metal conduit runs to a square or octagonal metal box through a knockout. Choose a box that is large enough to easily accommodate the size of the conduit.
If you are mounting the housing box and conduit directly to a wall, connect them with offset fittings. Connect each fitting to the box with a locknut and each fitting to the conduit with its integral setscrew connector.
Installing Flexible Metal Conduit
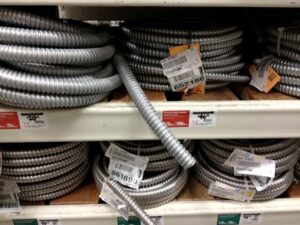
Also called Greenfield, or simply “flex,” flexible metal conduit is a good choice for large appliances such as washing machines that might need to be moved for repairs as well as for tight spaces that would make bending EMT too difficult.
Cutting flexible conduit. Like EMT and PVC, you can cut flexible conduit easily with a hacksaw. If you are using connectors and couplings that screw in, there is no need to ream the ends of the conduit after cutting.
Bending & supporting flexible conduit. Even though flexible conduit lives up to its name, a single run between boxes and fittings should not bend more than a total of 360 degrees. Conduit straps should be installed no more than a foot from a box or fitting and no more than 4 1/2 feet apart in a run.
Grounding conduit. Local codes require that flexible conduit be grounded; most systems simply run a grounding wire alongside the circuit conductors.
Installing Rigid Nonmetallic Conduit
The most commonly used of all nonmetallic conduit for home applications is Schedule 40 PVC. Resistant to fire, heat, and sunlight, this plastic conduit is lighter weight, less expensive, and easier to work with than EMT. However, it is not permitted in certain regions, so check your local building codes before installing it. To make sure you purchase the right stuff, check that it is marked with an endorsement from a testing lab for electrical materials; PVC pipe that is used in irrigation applications is not an appropriate substitute.
Nonmetallic conduit also requires using PVC housing boxes. Since nonmetallic conduit systems are not grounded, a grounding wire must be run alongside the conductors.
Cutting & trimming conduit. As with EMT, PVC can be easily cut with a hacksaw. Be sure to file down rough edges after cutting to prevent the conductors from becoming damaged.
Joining conduit. Straight Schedule 40 PVC comes in lengths that are 10 feet and have one coupling apiece. Use gray conduit cement to join conduit to fittings.
Bending nonmetallic conduit. PVC conduit can be bent using an infrared heater specially made for this purpose. Do not try any other heat source, such as a blowtorch, or you will simply ruin the conduit. Of course, the easiest method is simply to buy PVC that has already been bent. When designing your system, plan it so that no run of conduit between boxes or fittings makes more than the equivalent of a 360-degree turn.
Supporting conduit. To support nonmetallic conduit, place straps no more than 4 feet from each box or fitting as well as along the run.



 Don Vandervort writes or edits every article at HomeTips. Don has:
