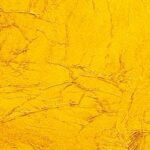
This expert step by step DIY guide will teach you how to paint frottage, a unique decorative technique that uses rubbings to create interesting patterns and textures.
Pressing film, fabric, or any other thin material into glaze and then peeling it off produces a finish known as frottage, which is the French word for “rub.” The technique results in a richly varied texture far different from what you can do with a brush or roller.
Materials used to create the texture are limited only by your imagination. Thin plastic, such as dry-cleaner bags or plastic food wrap, works well, as do inexpensive dropcloths.You can also experiment with highly textured fabrics such as burlap or lace.
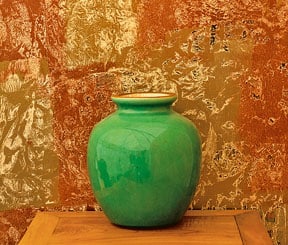
In the project shown here, glossy newspaper pages were used. The transference of some of their ink to the glaze adds to the mysterious, mottled look.
To achieve this effect, use pages from the Sunday magazine or from advertising iserts. The ink transfer is subtle, so you don’t have to worry about finding whole words or identifiable images appearing in reverse your wall.
Materials and Tools
- Base paint (eggshell sheen)
- Painter’s tape
- Glaze
- Paints or pigments to tint the glaze
- Rollers with covers (one per glaze color)
- Paint trays (one per color)
- Glossy newspaper pages
- Clear finish, such as acrylic or shellac
- Brush or roller for clear sealer
- Disposable gloves
Step-by-Step Frottage Painting
1. Over a properly prepared surface, apply two coats of base paint. Allow each coat to dry as the label recommends.
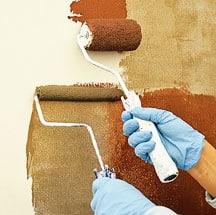
2. Apply painter’s tape to the top and bottom of the wall. You don’t need to tape corners if you will use this technique on adjoining walls.
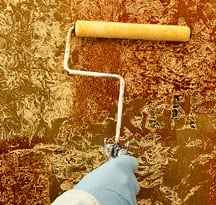
3. Crumple sheets of newspaper and then open them up. Let the wrinkles set while you prepare several colors of opaque glaze. Using separate rollers, apply the glazes in randomly sized blocks over an area about 3 by 3 feet. The blocks should meet each other.
4. Working quickly, press the wrinkled sheets into the glaze.
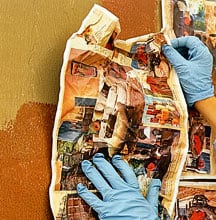
5. As soon as you have pressed paper into all of the glaze in a section, lift a corner of the first sheet to check that the ink color has transferred. If it hasn’t, leave the paper in place a little longer, but don’t wait so long that the glaze dries. The room’s temperature and the proportion of paint to glaze will affect the amount of time the process takes.
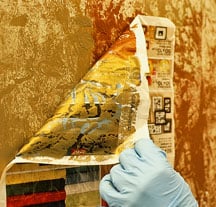
6. If small parts of newspaper stick to the glaze, leave them to add to the look, but brush or roll on a clear finish to seal the surface and keep the bits of paper from falling off. As with all techniques created with glaze, you should also apply sealer if you will need to clean the wall on a regular basis.



 Don Vandervort writes or edits every article at HomeTips. Don has:


