When those long, cold, barren days of winter have finally melted away, it’s time to fire up the irrigation system. So, you open the supply valve wide, turn on the timer, and then stand back to watch–in horror–as a geyser erupts in the middle of the yard.
What happened? Well, in your spring-induced excitement, you neglected to properly start up your irrigation system after its long winter nap. Fortunately, this scenario is easy to avoid. Just a few simple steps before you turn on your irrigation system will protect it from immediate and unforeseen damage, as well as make it more reliable year after year.
Gather Sprinkler Supplies
Be sure you have on hand a collection of spare irrigation parts’ fittings, risers, sprinkler heads, and nozzles just in case. Include some extra PVC and/or poly pipe, primer, and cement as well. It is better to have these things and not need them than to need them and not have them. Finally, if you have an automatic controller, replace the batteries used to preserve your timer settings.
Be Sure Soil Isn’t Frozen
Before actually ‘recharging’ your irrigation pipes, use a shovel or spade to confirm that the soil is frost-free to a full 12 inches below the surface. Filling your system too early can cause expensive freeze damage to your pipes.
Fill the Pipes
The greatest threat to your irrigation system, during initial start-up, is a surge of air pressure caused by the rush of water suddenly flowing into an empty pipe, giving the air in the pipe no time to escape. This often causes a banging sound in the pipe called “water hammer.” The surge pressure, which can reach as much as 15 times the desired operating pressure of the system, can burst fittings and cause sprinklers to literally blow right out of the ground. Worse still, even if your system doesn’t blow like Old Faithful, you may be risking system failure later on when you are away on vacation, say, or in the peak summer months when you need your irrigation system the most.
If your irrigation system isn’t equipped with air pressure relief valves or drains, remove the sprinkler heads located at the highest point of each zone. This will allow the air in the pipes to be pushed out of the system during refilling. Begin filling the system very slowly to minimize surge pressure and let you check the function of all the shutoff and zone valves.
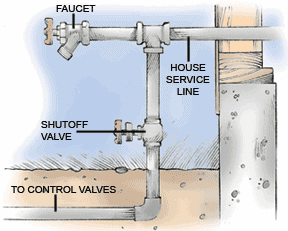
Begin the process by filling the main line of the irrigation system (located between the water source and the zone valves). Slowly open the shutoff valve that controls the water supply to the entire system. A quarter turn or so is all you will need. Take your time and remember that the water has to travel the entire length of the main line. Once the main line is filled, proceed with filling each zone, again, by very slowly opening the zone valve manually.
Manual operation of automatic zone valves differs from manufacturer to manufacturer, so read the product literature for instructions on how to manually operate the valve. Toro valves use an internal or external bleed screw to accomplish this.
Watch the spots where you removed the sprinklers on each zone. When the water pouring out of the open riser runs clear and is free of air bubbles, close off the zone valve. It may take as long as 30 minutes to carefully fill a zone. Once the water to that zone is shut off, either close the air-relief valve(s) or replace the sprinkler head(s) you removed, beginning with those closest to the water source. Then, move on to the next zone and repeat the process until all the zones are filled.
Test the System
Once you have filled the entire irrigation system, run each zone for two minutes. This lets you test your automatic timer while flushing out any remaining air as well as check that all the heads are spraying properly. As each zone is operated, check the area around the valves and sprinkler heads to be sure there are no leaks or breaks in the system and that all sprinklers are level with the ground and spraying correctly. Once everything is filled and operating correctly, you can then open the main supply valve to its full operating position. Finally, check to be sure your timer programs are still accurate, and if need be reset them.
NEXT SEE: 9 Summer Home Improvement Projects to Start In the Spring





 Don Vandervort writes or edits every article at HomeTips. Don has:
