Home electrical wiring can seem mysterious, but have no fear: This helpful guide will help you understand how wiring works and how to work with wire.
“Electrical wire” is a catchall term that refers to conductors that route electricity from a power source to lights, appliances, and other electrical devices.
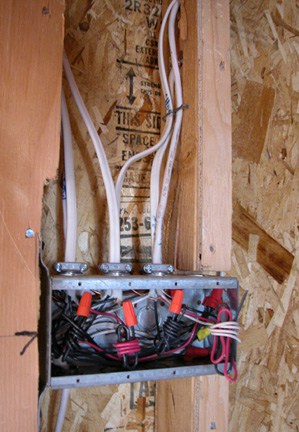
Wires and cables of various sizes bring electricity to a house and route it to all the lights, switches, receptacles, and electrical appliances. Generally speaking, large cables deliver electricity to the house and smaller cables and wires distribute it throughout.
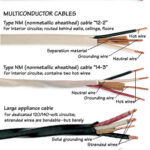
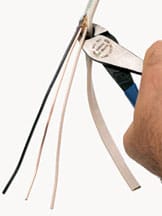
Nearly all household wire is copper, though aluminum is occasionally used. A rubber, plastic, or paper-like coating, called insulation, serves as a barrier to keep the electrical charge (and heat) where it belongs—in the wire (this insulation is stripped from the ends of the wires where connections are made). Bare (non-insulated) conductors are used for grounding.
How Electrical Wiring Works
Wire is a comprehensive term commonly used to refer to all types of cable and wire. Technically, an individual wire is called a single conductor; several single conductors twisted together or combined together in a sheath make a cable.
Just as highways can handle more cars than small streets, large conductors can handle more electricity than small ones. The diameter of a metal conductor is indicated by an AWG (American Wire Gauge) number; the smaller the number, the larger the wire. Most household lighting and receptacle circuits are wired with AWG 14 or AWG 12 conductors.
In addition to standard electrical wire, a house has several other types of wire needed for the telephone, cable television, stereo speakers, and so on. Most of these wires do not carry a dangerous electrical current because they operate on very low voltage or carry only sound or picture signals, not electrical power.
In this section of HomeTips, you will learn more about the Types of Electrical Wiring and the Types of Wires & Cables.
Electrical Wire Repair & Care
Electrical circuits can incur any number of problems, and, because of the potential fire hazard faulty wiring can present, it is important to diagnose and repair a problem immediately. In Electrical Wiring Repairs, we take you through a list of the most common problems and refer you to other articles that will help you narrow down the possibilities. One of the most common problems occurs with electrical cords and plugs, which can deteriorate after years of use. We show you how to replace them.
DIY Electrical Wiring Projects
This section of Electrical Wiring is devoted to the many home wiring projects you can do yourself. First we walk you through some basic techniques, such as How to Cut & Strip Wires and How to Cut & Rip Electrical Cable. Then we walk you through such common projects as How to Extend an Electrical Circuit and How to Mount a New Electrical Box. As with all do-it-yourself tasks involving electricity, make sure the power to the circuit from the main panel is turned off before attempting any repairs or installations.
Common Electrical Tools
If you have the skills and interest in doing your own electrical repairs, here are the tools you’ll need for most any job:
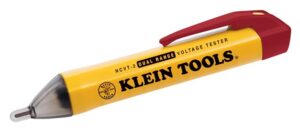
Non-Contact Voltage Tester
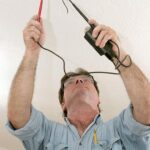
A non-contact voltage tester allows you to determine whether wires or electrical devices are electrically charged—without having to open up or disconnect wires. The type shown is designed to detect standard voltage in electrical cables, cords, lighting fixtures, switches, outlets, circuit breakers, and wires. It will also detect an electrical charge in low voltage equipment such as security, communications, entertainment, and garden irrigation systems. Browse voltage testers on Amazon.
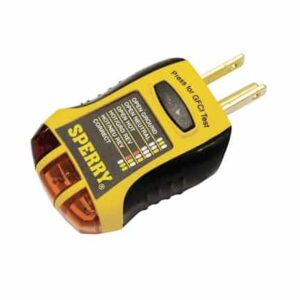
Electrical Outlet Tester
Simple and inexpensive, an electrical outlet tester just plugs into a conventional outlet to tell you whether the circuit is “hot” (charged) and properly grounded.
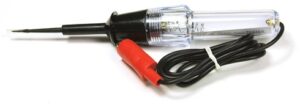
Continuity Tester
A small, battery-operated continuity tester costs less than $10. It can be used to determine whether wiring is broken or electrical circuits are complete. You can buy a continuity tester on Amazon.
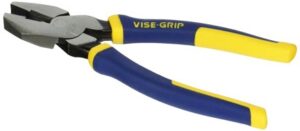
Lineman’s Pliers
A pair of lineman’s pliers is the best tool to use for cutting heavy wire or cable and twisting wire ends together. To twist two wires together, hold them side by side with one hand, their stripped ends aligned, and point the blunt end of the pliers in line with them, clamp down, and twist in a clockwise direction.
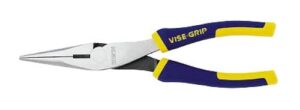
Long-Nose Pliers
Long-nose pliers are great for bending small loops at wire ends or for cutting off wires (most include a wire-cutting section). Use the pointed end of the pliers to form a smooth, 3/4 circle at a wire’s end, designed to circle around a screw terminal (always hook the wire onto the terminal with the end of the bend sweeping clockwise from the wire).
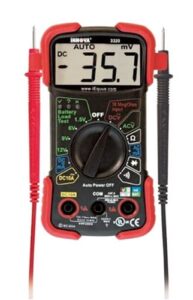
Multimeter
You’ll want to have a multimeter on hand for making a variety of continuity checks, checking voltage, and other similar tasks. Read the manufacturer’s instructions for a thorough understanding of techniques. Multimeters, which do the job of ohm meters, volt meters, and related tools, are sold at consumer-electronics stores for under $20. You can buy a multimeter here.
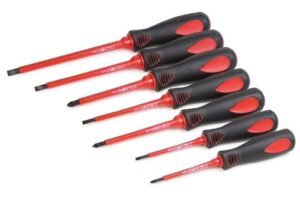
Electrican’s Screwdrivers
You’ll want an assortment of electrician’s screwdrivers with insulated rubber grips. Be sure to get both flat-bladed and Phillips-head drivers.
Wire Stripper
Most electrical wires run inside a sheath of insulation—a plastic, rubber, or paper coating that prevents bare conductors from shorting against each other or shocking you. When splicing wires or connecting them to devices, you must remove the insulation, a relatively simple job when you have an inexpensive wire stripper. The stripper should be set so that it cuts the insulation but doesn’t nick the wire (use the slot that matches the wire conductor’s size).




 Don Vandervort writes or edits every article at HomeTips. Don has:
