Expert step-by-step advice on how to cut aluminum, vinyl, and steel rain gutters and downspouts, using tin snips, a utility knife, or a saw.
Whether you’re tackling a gutter installation, a quick repair, or a complete replacement, cutting gutters and downspouts to the right size is an essential skill. This step-by-step DIY guide will take you through the process, ensuring clean cuts and a perfect fit for your home’s rain management system. We’ll delve into the specific techniques for various gutter materials – aluminum, vinyl, and steel – and discuss the differences in cutting gutters versus downspouts.
Understanding Gutter and Downspout Shapes
Gutters and downspouts serve the same purpose, but their shapes differ, impacting how you’ll approach the cutting process. Gutters typically have a horizontal, trough-like design that catches rainwater from the roof. Downspouts, on the other hand, are vertical and cylindrical or rectangular, channeling the water down to ground level.
Now, let’s grab our tools and start cutting!
1. Gather the Necessary Tools
Start by making sure you have the following tools ready:
- Tape measure
- Marker or pencil
- Sharp utility knife
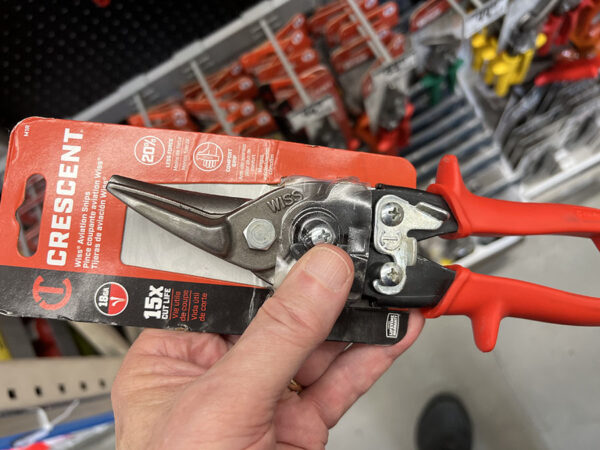
- Hack saw or reciprocating saw with a metal-cutting blade, or aviation (“tin”) snips
- Safety goggles
- Heavy work gloves
- Sawhorses and a board, or a sturdy work surface
If you have a reciprocating saw and the right blades for the job, this is usually the easiest tool to use for cutting. If you don’t have this tool, aviation snips work well for cutting aluminum or vinyl (PVC) and cost about $18. When cutting thin vinyl, you may be able to use a sharp utility knife.
2. Consider the Gutter Material
Each gutter material requires a specific approach to cutting. Here’s a breakdown of the common gutter materials and the tools and techniques you’ll need:
Aluminum Gutters
- Most Common: Aluminum gutters are the most popular choice due to their lightweight nature and resistance to corrosion.
- Cutting Tools: Aviation snips, hacksaw, or reciprocating saw with a fine-toothed metal-cutting blade.
- Cutting Tips:
- Handle with care—aluminum is soft and prone to dents and deformations.
- Avoid excessive force.
Vinyl Gutters
- DIY Friendly: Vinyl gutters are a favorite for homeowners because they’re lightweight, budget-friendly, and relatively easy to install.
- Cutting Tools: Sharp utility knife, hacksaw, or reciprocating saw with a sharp, fine-toothed blade.
- Cutting Tips:
- Apply light but steady pressure to prevent cracking.
Steel Gutters
- Durable but Less Common: Steel gutters offer strength but are less popular for residential use due to their higher cost and susceptibility to rust if not maintained.
- Cutting Tools: Reciprocating saw with a bi-metal blade specifically designed for cutting sheet metal.
- Cutting Tips:
- Apply consistent pressure for clean, accurate cuts.
- Be cautious of sharp edges after cutting; file them down for safety.
For safety: Always wear safety glasses and work gloves when cutting gutters and downspouts. Use caution when working at heights or on ladders. Always follow proper ladder safety guidelines.
3. Preparing to Cut a Gutter or Downspout
Before you can cut a gutter or downspout that’s attached to the house, you’ll need to disconnect it—at least partially. If you can take it down reasonably easily, it will be easier to work with the gutter or downspout placed on a board or plywood sheet over a pair of sawhorses. Otherwise, you can cut the partially-disconnected section in place.
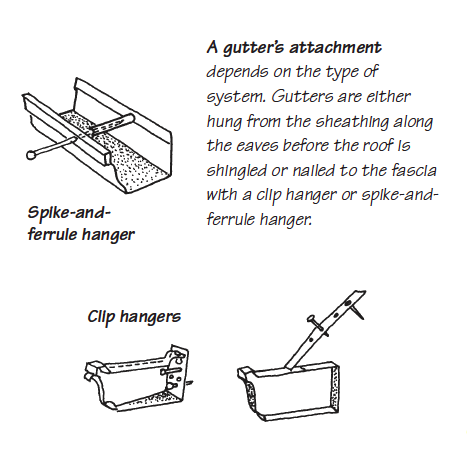
For a gutter, use a pry bar or old screwdriver to loosen and remove any screws or brackets that secure the gutter to the fascia board. Carefully detach the gutter from any brackets, starting from one end and working your way along the section. Be careful not to damage the fascia board.
For a downspout, you may need to remove screws, clips, or downspout straps that connect the downspout to the wall with a pry bar or screwdriver. Gently pull the downspout away from the attachment points, being careful not to damage the wall surface.
4. Measure and Mark
Carefully measure the length needed for your gutter or downspout section using a tape measure. Mark the measured length all the way around the gutter or downspout, using a marker or pencil and a combination square. Double-check your measurements.
5. Secure the Gutter or Downspout
Ideally, place the gutter or downspout securely on sawhorses or a sturdy work surface. This provides stability and ensures clean and controlled cuts. If the gutter or downspout is still partially attached, support it securely with one hand while you cut with the other hand. Keep a secure grip on the gutter.
6. Cut the Gutter or Downspout
Whether you’re cutting a section out of an existing gutter or cutting a new section to size, follow these steps to cut the gutter or downspout:
- Put on protective safety glasses and work gloves.
- Using the appropriate cutting tool discussed in Step 2, carefully cut along the marked line. When using a saw, apply gentle pressure and let the saw do the work, taking your time so you get a straight, clean cut. When using tin snips, place the cutting blades on the marked cutting line, apply steady and controlled pressure to the handles, squeezing them together to make the cut. Start at one end of the marked line and work your way along, following your cutting guideline.
- After cutting the gutter or downspout, remove any roughness or burrs on the cut edges, using a file or sandpaper to prevent cuts or scratches during installation.
7. Test Fit and Install
Once the gutter or downspout section is cut and smoothed, test its fit. Make any necessary adjustments before installing the section using appropriate connectors, brackets, or sealants as per the manufacturer’s instructions.
FAQs: Cutting Gutters and Downspouts
Q: Can I use the same tools for cutting gutters and downspouts?
A: Generally, yes, but it’s essential to consider the material. Some tools, like a hacksaw, can be used on aluminum, vinyl, and steel, while others, like aviation snips, are better suited for specific materials like aluminum.
Q: How do I measure gutters and downspouts for cutting?
A: Measure carefully, ensuring accuracy. Use a tape measure to determine the needed length, and mark the cutting point clearly on the gutter or downspout, using a pencil or permanent marker. Pro Tip: For round downspouts, wrap a piece of paper around the pipe and mark where the paper overlaps for a perfectly straight cut.
Q: What safety precautions should I take when cutting gutters?
A: Always prioritize safety:
- Wear safety glasses and work gloves. Handle sharp edges with care.
- Use caution when working at heights or on ladders. Follow proper ladder safety guidelines.
Q: How do I ensure a clean, straight cut?
A: Use a sharp blade appropriate for the material, and apply steady pressure. For long cuts, consider using a guide or clamping the gutter or downspout to a stable surface.
Q: Can I cut gutters and downspouts on the ground?
A: Yes, it’s often easier and safer to cut them on the ground before installation. However, for replacements or repairs, you might need to cut them in place.
Q: What if I make a mistake and cut too short?
A: Unfortunately, there’s no easy fix for cutting too short. Measure twice and cut once to avoid this issue.
Q: Do I need any special tools for cutting vinyl gutters?
A: A sharp utility knife is often sufficient for vinyl gutters, but a hacksaw or reciprocating saw can also be used.
Q: Can I paint gutters after cutting them?
A: Yes, but ensure the cut edges are clean and free of debris before painting. Pro Tip: The glossy surface of vinyl gutters doesn’t hold paint well, so it’s important to properly clean and sand the surface to ensure proper adhesion. You’ll also need to use a primer specifically designed for vinyl and a high-quality exterior acrylic paint.
Q: Should I hire a professional for gutter installation or repair?
A: While DIY gutter work is possible, if you’re uncomfortable working at heights or lack the necessary tools, it’s best to get bids from a professional.


 Don Vandervort writes or edits every article at HomeTips. Don has:


