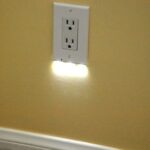
Learn how to wire an electrical receptacle with this expert DIY guide, with steps for wiring and back-wiring terminals. Remember to turn off the power!
Before you begin wiring an electrical receptacle, or outlet, remember the iron-clad rule of making sure the power to the area you are working on is shut off. You can trip the breaker on the service panel to the localized circuit or, if you do not know which circuit it is, you can trip the breaker to the entire house. Use a circuit tester (also called a neon tester) to confirm the circuit is dead. If you’re not comfortable doing this yourself, hire an electrician.
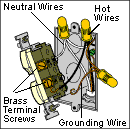
There are two ways in which to wire an electrical receptacle: using the screw terminals on the sides of the receptacle or back-wiring the device utilizing the wire holes on the back of the outlet. Screw terminals are the most common and reliable connection points.
Wiring a Screw Terminal
To make connections using a screw terminal, you will first need to strip 1/2 to 3/4 inch of insulation from the end of the wire using wire strippers.
1 After stripping the wire, form a hook at the end of the wire with a pair of long-nose pliers. Start near the insulation and gently bend the wire toward the end until a loop is formed.
2 Next, hook the wire clockwise around the screw terminal on the side of the receptacle. Tighten the screw with a screwdriver. As you do this, the hook will begin to close. (If you put the hook onto the screw counterclockwise, the hook will open when you tighten the screw.)
Back-wiring a Terminal
On the back of the receptacle is a gauge that will help you measure how much of the insulation to strip off the end of the wire. After you determine how much wire to expose, strip the prescribed amount from the end of the wire.
1 Poke the stripped wires into the appropriate holes on the backside of the receptacle. When you insert the wires into the holes, they are held in place by a “jaw” that prevents them from being extracted without using a small screwdriver or blade inserted into a special slot next to the hole to release the tension.
2 Once you have checked to make sure the wires are secure, tighten down all the other screws on the back of the receptacle.
Keep in mind that back-wiring is suitable for copper and copper-clad aluminum wires only—not aluminum wires. Also, because screw terminals are more secure than back-wired receptacles, many professionals and local codes discourage back-wiring, at least for 20-amp receptacles.




 Don Vandervort writes or edits every article at HomeTips. Don has:
