Want your Christmas tree to stay fresh and green through the season and beyond? Try these simple tips.
Here’s a how-to guide that offers our secrets for making your cut Christmas tree last throughout the entire holiday season.
You’ll need a:
- Tree saw
- Drill/driver and 1/2-inch bit
- Rubber mallet
- Screwdriver
- Christmas tree stand (We prefer the two-part kind that has a container you secure onto the trunk and then set into a base that you lock down once the tree is straight.)
It helps to have:
- Disposable latex gloves
- WD-40
- An assistant
Step-by Step Instructions
1 Cut your own tree.The problem with trees bought in Christmas tree lots is that most were cut several days—if not weeks—before they reached the lot. The only way to get a truly fresh tree is to cut it at a Christmas tree farm. Disposable latex gloves will protect your hands from sap and pitch. (If you do get pitch on your hands, apply cooking oil with a paper towel to remove it.)
2 Stretch a plastic sandwich bag around the cut end of your tree and fasten it on with a rubber band immediately upon cutting the tree. After you’ve loaded your tree into or onto your vehicle, head home immediately—no stopping for brunch!
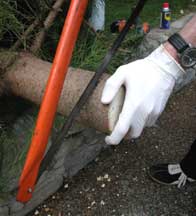
3 After you get the tree home, lay it on its side and use a tree saw to make a straight cut, removing about 1 inch off the bottom of the trunk. Applying WD-40 to the saw blade before cutting will keep the blade moving freely in the cut.
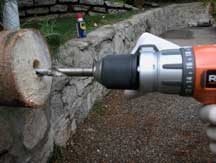
4 Using a 1/2-inch drill bit, drill a hole straight into the bottom of the trunk to receive the spike at the bottom center of the Christmas tree stand. Then drill three or four holes around the edge of the trunk where it will be submerged in water. This will help it absorb the water.
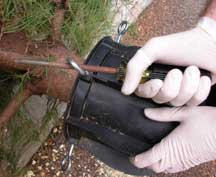
5 Push the stand’s container onto the trunk so that the bottom drill hole sits on the stand’s inner spike; secure the stand in place with a few quick blows of a rubber mallet.
6 Finger-tighten the eye bolts so the trunk is centered evenly in the stand. Then use a screwdriver to tighten the eye bolts securely.
7 Lift the tree into standing position. (Have your helper designate the tree’s “front.”) Set the stand in place, and then lift and secure the tree and container into the base.
8 Immediately fill the container with water and add in a package of tree nutrients for extra longevity (this can be bought at a local nursery and most Christmas tree lots). Adding aspirin to the tree’s water also increases the tree’s ability to absorb nutrients.
9 Check the tree’s water at least three times per day for the first few days and then daily. To prevent the base of the tree from sealing up, be sure to keep the container at least half full of water at all times. (You can set short length of PVC pipe into the basin to make it easy to add water without having to crawl under the tree!)
10 Place the tree away from heat sources such as registers, vents, and fireplaces to keep its branches from drying out.
Happy Holidays!
RELATED POSTS:
• How to Hang Christmas Lights
• The Best Way to Store Christmas Lights
• Ladders: The Ultimate Guide to Choice and Safe Use
• 8 Things to Do Before Guests Arrive
• How to Get Your Home Ready for Overnight Guests





 Don Vandervort writes or edits every article at HomeTips. Don has:


