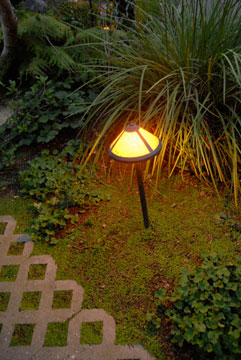
Learn how to install outdoor lighting with this helpful DIY guide, which covers lighting design and step-by-step tips on motion detecting lights.
Thanks to low-voltage systems that are commonly available at home improvement centers, installing outdoor lighting is an easy weekend project.
You can either buy a kit that includes fixtures, transformer, and cable, or you can mix and match. If you do the latter, be sure the transformer and cable can handle the load of the fixtures (see Outdoor Lighting Buying Guide).
You can install a minimal system for under $500. A 300-watt transformer will cost from $100 to $200, and direct-burial lighting cable and a few lights will cost another $200 or so.
If your plan entails considerable electrical work or a particularly complex lighting arrangement, it may be wise to hire an outdoor lighting or landscaping contractor to do the work.
First decide where you’ll locate the transformer. Be aware that you’ll need to plug it into a GFCI-protected electrical receptacle. Ideally, you’ll want the location of the transformer to be fairly near the location where the lights will be installed. Mount the transformer off the ground by screwing it to siding, a fence post, or another sound support.
Next place the light fixtures on the ground where you intend to install them.
Then run outdoor electrical cable from the transformer to each of the light fixture locations. Keep in mind that you will want to protect the cable from damage, so opt for a route where you can dig a trench, run it along the base of a fence, or lay it along the surface where it won’t be disturbed by gardening or foot traffic. If you decide to bury the cable in certain places, a shallow 3- to 6-inch trench will do.
Join the fixtures’ wires to the main cable. For the job, you can employ simple connectors made for this job—they have sharp terminals that bite into the wires when you snap or screw them in place.
Seat the fixtures firmly in the soil and cover their connecting wires with soil or mulch.
Then strip 1/2 inch of insulation from the main cable and attach the wires to the transformer’s terminals. With some transformers, you just push the bare ends of the wires into terminal holes; with others, you wind the wires around terminal screws and then tighten the screws.
Following the owner’s manual, plug in the transformer and turn it on to test the lights. Look for a light or listen for a hum that indicates the transformer is on. If none of the lights work, the problem is probably a poor connection at the transformer. If some of them work, the ones that don’t probably have a faulty connection at the light fixture.
Installing Motion Sensor Lighting
An easy way to improve the safety of your home—and save energy in the process—is to install a motion-sensing outdoor light fixture. These turn on when they detect movement and also turn off automatically, giving you illumination only when you need it and foiling potential intruders.
The following instructions detail how to replace an existing fixture with a motion-sensing fixture.
1 Once you have made sure that the circuit supplying power to the fixture has been shut off, remove the existing fixture. To do so, loosen the nuts and/or screws that secure the fixture to the wall. Use a voltage tester to ensure that there is no power coming from the wires in the box.
2 Grasp the new fixture, and pull its wires through the attached rubber gasket. Attach the fixture’s leads to the box’s corresponding wires, starting with the green ground lead (or screw) and wire and continuing on to the white and black leads and wires.
3 Raise the fixture into place, making sure the rubber gasket forms a good seal with the box. Fasten the fixture with nuts and/or screws. Double-check the seal.
4 Turn the circuit back on to supply power to the fixture. Aim the light in the direction you would like illumination. Tighten the nut to secure the light in place.
5 Turn the sensor so that it picks up motion on your path and also in your yard. Be careful not to aim it so that it detects movement from cars driving by. Calibrate your sensor’s range of sensitivity (many have a dial allowing you to do so).
6 Set the timer on your motion-sensor light—this tells the sensor how long the light should stay on after detecting movement.


 Don Vandervort writes or edits every article at HomeTips. Don has:


