This expert step-by-step DIY guide will teach you how to paint a stenciled border on walls as an interior decorative finish.
There are many ways stencils can be arranged and applied. A border of small stencils lends a subtle accent high on a wall. Repeating larger patterns creates a wallpaper effect. Use one color for a clean and uncluttered look, or use several colors for a more elaborate design. Using textured paint or plaster instead of flat paint can give your design a three-dimensional pop. With a single stencil and some artist’s acrylics, you can add architectural interest to a plain room.
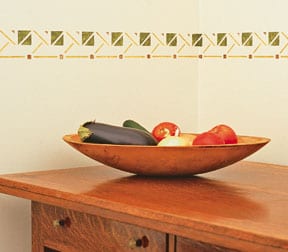
Many stencils draw heavily from the 19th- and 20th-century Arts and Crafts movement, making them an ideal complement to bungalow and Craftsman Revival homes. Even homeowners with limited artistic ability can create charming decorative designs using the many styles and shapes available.
Painting a row of repeating designs is often more effective than scattering stencils around the room, especially if you place the row where wood molding might otherwise be.
To speed your work, use a stencil that includes several repeats of the design.
One-layer stencils, as used here, can be painted in a single color or several. If you choose multiple colors, first test the effect on a sample board.
Since no glaze nor protective finish is needed, use any paint.
Tools & Materials
- Artist’s acrylics in various colors
- Stencil
- Stencil brushes
- Waterproof container to use as a palette
- Painter’s tape or spray-on stencil adhesive
- Level
- Cotton T-shirt rags
Step-by-Step Stenciling Techniques
1. Begin by inspecting the stencil to determine which side goes out and mark it with a short piece of painter’s tape.
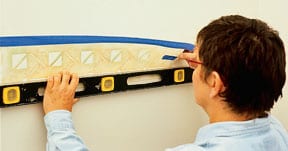
2. Apply painter’s tape to one edge of the stencil, or spray the back with stencil adhesive. If you choose adhesive, wait for it to become tacky. Using a level, position the stencil where you want the design to be.
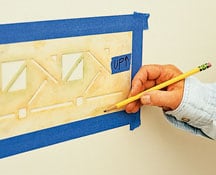
3. With a pencil, mark the spots provided on the stencil to ensure that pattern repeats line up properly. You’ll use these dots when you reposition the stencil.
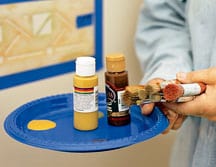
4. Pour a small amount of each color of paint into a shallow container that’s easy to carry. A plastic plate works well. Next, gather your stencil brushes, which have thick tufts of short, stubby bristles.
5. Lightly dab a brush into the paint so that the bristles pick up only a little. Blot off any excess on a paper towel. Once you start with a color, paint all sections that need it before you clean the brush and go on to another color. Or, use a different brush for each color and wipe the bristles on a dry cloth each time you finish using it.
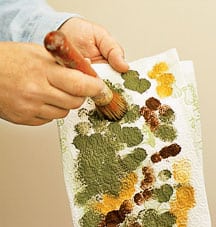
6. In small, squat openings, transfer the paint with a flicking motion, not with a long brushstroke. This and the other motions used for stenciling are designed to fill openings with color in a way that prevents drips and blobs.
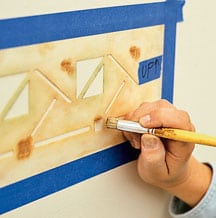
7. Fill in long, thin openings with more of a bouncing motion, as if you were stippling the design.
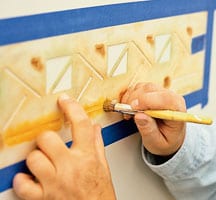
8. On wide openings, paint in a circular motion. Work from the edges toward the center so paint doesn’t leak under the stencil.
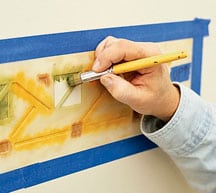
9. When the entire design is painted and has dried, pull off the stencil and reposition it. Use the pencil marks you made in step 3, but also check the alignment with a level. Move the stencil slightly, if necessary, to keep it level. Otherwise, slight irregularities will add up and the final stencil will be noticeably out of line with the first one.
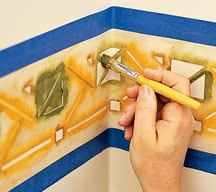
10. As you near a corner, be aware that the stencil may not end where the wall does. You may be able to bend a simple stencil like this into the corner and continue with the design on the next wall. Another option is to stretch out or condense the design so that it fits. You may be able to add slightly more space between elements, for example.

Stencil Strokes & Techniques
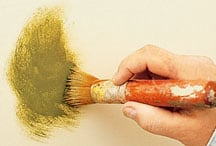
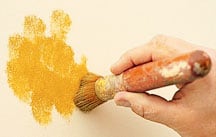
Painting over a stencil the way you’d paint a wall will push paint under the cutout, creating a blurred, sloppy image instead of a sharp design. Instead, use circular, up-and-down, or stippling brushstrokes to keep the paint within the lines.
1. Move the paintbrush in a circular motion.
2. “Stipple” the paint by dabbing the brush up and down onto the surface.





 Don Vandervort writes or edits every article at HomeTips. Don has:
