Step-by-step instructions about how Don Vandervort finished his a pine kitchen table, including sanding, using a tack rag, and applying a polyurethane finish.
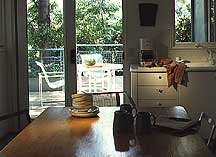
Upon completing a major kitchen remodel almost a decade ago, my wife, Bobbi, and I purchased a sturdy 7-foot-long, natural pine table. If my math is correct, we’ve eaten about 1200 meals on that table since then. Needless to say, it has gathered its share of nicks, dings, and rings.
Originally, the table was given a beeswax finish, which presented a nice, amber patina and protected the soft wood from stains. But we discovered that this finish presented one serious problem: coffee cups and hot bowls and plates would stick to it. Set a piping hot bowl of oatmeal on the surface and you’d have to pry it up later. And this would leave a mark that would have to be buffed out later.
Placemats solved the problem, but who wants to use placemats all of the time? Between this problem and the generally poor condition of the finish, we finally decided it was time for a change.
I think Bobbi gave up on the possibility that I would break free the time to refinish the table, so while I was away for a week, she started the job.
She wanted to take advantage of the almost-empty house, with the idea that it’s best to do this kind of job when the fumes, mess, and upheaval are least disruptive to family life. This also was a week when the weather was beautiful, allowing her to open the windows and doors for plenty of ventilation. (The table is too large to easily move out to the deck or garage.)
She did a little research to learn how to get beeswax off of a pine table and discovered that the most effective solution was paint remover.
After protecting the floor with a layer of plastic sheeting and newspapers, she followed the label directions, applying the paint stripper liberally and allowing it to loosen the wax. Then she used a 4-inch-wide scraper (the kind that looks like a wide putty knife), to carefully lift the loose wax from the surface without scratching it. She repeated this process a couple of times to get most of the wax up.
Next, she used fine (00) steel wool to scrub off the residual wax. Because this steel wool kept clogging up with wax, she used quite a lot to get down to bare wood. Then she used fine sandpaper on a sanding block to smooth the wood, sanding only in line with the wood grain (you can tell she has done a lot of this sort of thing). At this point, she cleaned up the area and protected the table with a plastic tablecloth until we could decide upon a new finish together.
Needless to say, when I returned from my trip, I was thrilled to see that she had taken care of the hardest, messiest part. And now, because the table had no finish at all, I would have to make time to help complete the job.
We settled on a satin urethane finish: clear, natural, protective, and hard enough to pass the steaming-hot coffee cup test. To ensure the wood’s equal absorption of the finish, we decided to apply a coat of urethane sanding-sealer before the finish coat.
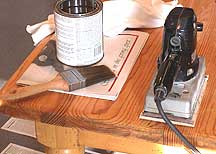
But first I wanted to do a little more sanding with my electric finishing sander, equipped with fine, 220-grit sandpaper. Wearing a dust mask, I sanded in line with the wood grain until the surface was smooth. (Note: This table has an antique look, with little nicks and marks that add to its character; I was careful not to sand too much.)
I dampened a clean rag with mineral spirits (this is called a “tack rag”) and wiped all of the sawdust from the surface. Then we let the dust settle and thoroughly vacuumed the area to minimize dust during application of the finish.
Here’s an important tip: Never shake a can of polyurethane—your resulting finish will be full of bubbles. Stir it.
I applied the first coat of sanding sealer evenly, using a synthetic trim brush. Then I allowed it to dry thoroughly. This actually took longer than the label directions indicated; the surface was still a bit gummy after 24 hours, so I let it cure an additional day. When it was fully dry, I sanded again with 200-grit sandpaper, vacuumed the area, and wiped the surface with the tack rag.
Last, I applied three coats of satin polyurethane in line with the wood grain, according to the label directions. I allowed it to dry thoroughly after each coat and repeated a light sanding, vacuuming, and wiping with a tack rag before the final coat.
Now our table looks great and, just this morning, we enjoyed bowls of hot oatmeal on it without placemats. —DV



 Don Vandervort writes or edits every article at HomeTips. Don has:
