Expert advice on how to install screens on a porch or deck, using simple staples or vinyl-spline screening systems.
Build Patio Screening Framework
Vinyl Spline Porch Screening
If mosquito invasions or other flying bugs are preventing you from enjoying your porch in fair weather, now’s the time to think about screening it in. A porch can be screened-in using a number of different methods. The one that is right for you will depend on what kind of porch you have and on whether or not you want to be able to remove the screening. If your porch has framed-in bays, attaching screening is easy. On the other hand, if your porch has only posts, you will have to build a framework to which you can attach the screening.
To screen-in a porch with the requisite framework, first position the screening mesh so that it is at right angles to the framing. Stretch the screening as taut as you can, and, starting at the center top and working outward, attach it with staples every 2 inches. Then attach the bottom and finish with the sides in the same fashion. When you have completed the job, use 3d galvanized nails to cover the stapled framing with 3/8-by-3/4-inch batten.
Attaching screening in this manner is a simple and fast job, but the results are permanent, which may not be desirable. It also can be difficult—if not next to impossible—to stretch the screen taut enough to prevent it from eventually sagging and bagging.
Perhaps a better option is to screen-in your porch using removable screens. This method requires precise measuring and making the screens, but in the long run it is the more practical solution. The screens can be easily removed when they’re in need of repair (or simply not desired), and it is infinitely simpler to stretch screening taut over removable frames.
Framing screens yourself is not a difficult task, but the affordability and reliability of a professional screen shop makes it a compelling choice. Yet another easy and affordable method of mounting screening is to use a vinyl-spline system like the one discussed below.
Build a Framework for Patio Screening
If your porch already has a framework, your task is relatively simple. But if your porch only has posts, you will need to construct a framework to attach the screening to. Here’s how:
1Cut a top plate from a 2-by-4 so that it fits between the porch’s posts. Using 16d galvanized nails, secure it to a beam or to joists. If the top plate parallels the joists, secure it to nailing blocks installed between the joists. Cut a 2-by-4 for the bottom plate, and position it directly beneath the top plate.
Measure and cut the bottom plate where you will install the screen door. Secure the plate with 16d galvanized nails if the floor is wood or with masonry anchors if it is concrete.
2Install wall studs with stud-framing clips on 16- or 24-inch centers where needed to support the screening. Position them so they are flush with the plates’ edges. Check plumb and nail the clips to the studs and plates, or toenail the studs to the plates with 12d nails.
3Cut knee rails and supports for each end of each knee rail out of 2-by-4s. Toenail the supports to the bottom plate. Then toenail the supports and the knee rails to the posts and/or studs.
4If you would like the screening to be removable, you can build screen frames to fit into the openings created by the framework. First, build screen surrounds from beveled 1-by-4s and nail them in the openings.
Then nail 1-by-1 stops flush with the outside edges of the surrounds, checking for square as you go. Assemble 1-by-3s to create the screen frames, and, using 1 1/2-inch screws, drive them in at an angle to secure the frames to the stops.
Vinyl Spline Porch Screening
For screening that’s particularly easy to install and replace, check out vinyl-spline screen-attachment systems. These systems use base-attachment tracks and vinyl splines to lock screening into place. The vinyl components, which can be cut with pruning shears, allow for quick, professional-looking installation at relatively low cost.
To install one system, called Screen Tight®:
1Use 1-inch screws to attach the system’s vinyl channels along each edge of the frame. Drive the screws through the screw slots along the entire length of each mounting strip.
2Stretch screening over each opening, making sure the mesh is at right angles to the frame.
3Tape the screening in place, beginning at the top and working your way down the sides.
4Feed the top-edge spline into the track and, using the concave end of a screening tool, roll it securely into place.
5Remove the tape and roll in the bottom edge, followed by the sides and mid-rail, if the screen has one. Make sure you keep the screening as taut as possible during this process.
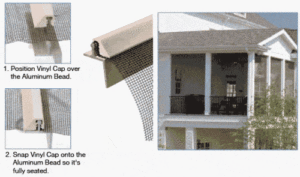
6Use a utility knife to trim off the excess screening and snap trim caps onto the splines. If a trim cap is too long, cut it to size with pruning shears.
7Make sure each butt joint aligns with that of the frame. Gently hammer the trim caps over the channels with a mallet to lock the screens in place.


 Don Vandervort writes or edits every article at HomeTips. Don has:


