Expert instructions for routing electrical cable where there is easy access and where there is not
Before you can mount a new receptacle, you will need to run cable from the power source to the new box location. Following is how to do this with or without easy access:
Routing Electrical Cable with Access
If you are fortunate enough to have access from a basement, crawlspace, or attic, plan to run the cable along joists or beams (or through holes drilled in them). In this way, you will be able to “fish” the cable through.
To fish a short run from below or a long run from above:
1 Drill a small guide hole up through the ceiling or down through the floor to mark the location of the center of the hole for the new box.
2 From the basement or attic, locate the guide hole. Using it as a reference point, drill a 3/4-inch hole into the wall-frame sole plate.
3 Insert ”fish tape” or a wire through the box hole and up or down (whichever is applicable) through the drilled hole. Attach the cable to the tape or wire, securing it with electrical tape (to avoid the frustrating experience of dropping the cable midway through the pull), and draw it back through the box hole. You might find it helpful to have a second pair of hands to help with this part of the job and also to hold a flashlight to see that the run is clear before you begin the cable-fishing process.
Routing Electrical Cable with No Access
There are situations when you will be running new cable in an area that does not have access from above or below and therefore requires cutting into a wall or ceiling surface covering. While this is definitely doable, it does require a bit more consideration, planning, and patience.
There are many ways to route cable, but, if it passes through wood less than 1 1/4 inches from a finished surface, you will need to install 1/16-inch metal plates on the framing members to protect the cable from being damaged when the covering is replaced.
Routing cable behind a baseboard. Carefully remove the baseboard between box locations. Next, cut away the wallboard and route cable along notches in the studs. Cover the cable with protective metal plates.
Routing cable along a wall. Cut the box hole(s) and then neatly cut a straight, narrow strip of the wall covering to expose the studs. Drill through the center of each stud and run the cable through the holes.
Running cable around a doorway. Remove the door casing and baseboard, and then run the cable between the doorjamb and rough framing, notching spacer blocks or shims to allow the cable clear passage.
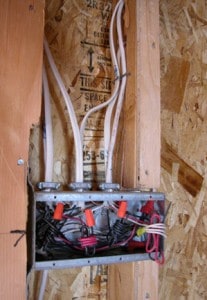
Installing back-to-back devices. If you are installing a new box opposite an existing one, offset the new hole a few inches from the other. Pull the existing receptacle out of its box and route the cable through a knockout hole in it directly into the new box hole.
Routing Cable for a Light & Switch
You can extend a circuit to accommodate the addition of a ceiling light and switch. Keep in mind that this process involves three locations—the existing power source, the new light-switch box, and the new fixture box located in the ceiling.
1 Position the fixture box between two ceiling joists and cut the hole for its location. Next, cut a hole for the switch box, and make a hole where the wall meets the ceiling. Drill a hole in the top plates. Now, cut an access channel along the baseboard between the switch box location and the power source.
2 Run one cable between the power source and the switch-box hole. Next, “fish” a second cable from the switch hole to the access hole, doubling back along the baseboard.
3 “Fish” from the fixture-box hole to the access hole via the drilled hole in the top plates. Attach the second cable and pull it through the access hole, the top plates, and out the fixture-box hole.
Find an Electrical Pro Near You




 Don Vandervort writes or edits every article at HomeTips. Don has:
