Each winter in many areas of the country irrigation systems must be ‘put to bed’ for the season. In the North, they must be completely drained and dried to prevent damage to the system components caused by water freezing inside the pipes, sprinklers, and valves. Serious damage and/or personal injury can result if improper or no winterization methods are employed.
The easiest way to winterize your system, of course, is to hire an irrigation contractor to do the job. Depending on the size of your system, it will cost between $50 and $150. Doing it yourself will save you those dollars, and, after the first time, it should not take you more than an hour or so.
When contractors winterize a system, they install a drain valve or other fitting (if it does not already exist) for attaching a compressed air hose downstream of an anti-siphon device at each zone. The air is used to blow all the water out of the system.
After shutting off the water to the system, the technician will attach the compressed air hose to the blowout connection and, one zone at a time, blow out all the water. Then, all that is left to do is drain the line between the backflow prevention device and the shut-off valve.
If you decide to do the job yourself, there are a couple different tacks you can take: drain the system using drain valves, or blow out the system the same way a contractor would. If you don’t own a good-sized compressor, the easiest way is to just drain the system.
Drain valves are usually installed when the system is installed. Adding them later is time consuming but not out of the question considering the money you can save. One will need to be placed at the low point of each zone. For soils that drain poorly, you may need to dig a dry well (a 6- to 8-inch-deep hole with a few inches of gravel in the bottom) below each drain valve to ensure that no water collects. There are two types of drain valves’ manual and automatic.
If your system uses manual drain valves, the first thing to do is shut off the main irrigation water supply valve. It should be located near your water meter at a tee connection. If applicable, turn off the power to your well pump and drain those lines too.
Next, open all the drain valves downstream of the zone valves to allow drainage of the lines. Leave them open for a few hours or even a couple of days to allow all the water to escape.
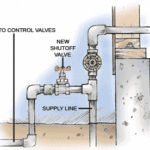
Finally, open the drain valves upstream of your zone valves to drain the main irrigation supply line. Even if this line is in your basement, it should be drained since it runs through the foundation wall of your home and is exposed to outside temperatures.
If your system is installed with automatic drain valves, the lines downstream of the automatic zone valves will drain whenever there is no system pressure. It is a good idea to first check that the drains are working. Do this by watching each zone’s operation. Systems using automatic zones require a few seconds to ‘charge’ before the sprinklers operate. If a zone operates too quickly, the drains may not be draining properly. If in doubt, remove a sprinkler to check for standing water in the line.
Next, open any drain valves upstream of the automatic valves to allow drainage of the plumbing that runs between the main shut-off and the valve manifolds.
If you want to be sure your zone valves are dry and protected, the best thing to do is remove them for the winter and then reinstall them in the spring. Depending on the size of the system, this could take a few hours to accomplish.
If you do own a 25 CFM or larger compressor with a pressure regulator adjustable to 40 PSI or less, the best way to winterize your system is by following the same procedure a contractor would. But you will have to install a suitable connection for the air hose downstream of the anti-siphon device.
First, shut off the main water supply valve. Connect the air compressor to a fitting downstream of it. With the air pressure applied, activate each automatic valve manually from the control. Do not exceed 40 PSI (2.8 kg/cm2) of air pressure or it could result in severe equipment damage. Let each zone valve remain open until all water has been expelled from that zone, but do not blow a zone any longer than needed. After all the valves and zones have been blown out, disconnect the air hose. Finally, open any drains installed between the main shut-off and the valve manifolds.
The key to winterizing your system is to be patient and thorough in your approach. Just doing things like leaving your drain valves open for a few days in order to let them dry out completely can make all the difference next spring when you recharge your system.
Courtesy Yardcare.com





 Don Vandervort writes or edits every article at HomeTips. Don has:
