A guide to easy and effective ways to clean your oven, both naturally and with commercial cleaners. Learn how to tackle stubborn stains, remove grease, and keep your oven sparkling clean.


Highlights
- Your oven should be cleaned once every 3 to 6 months.
- Baking soda and vinegar can remove grime and grease buildup effectively.
- Be extra careful not to scratch the oven glass door while cleaning it.
Is your oven a battleground of burnt-on spills and greasy splatters? Don’t despair! Cleaning your oven doesn’t have to be a dreaded chore. We’ve got you covered with proven methods that tackle even the toughest grime, using both DIY solutions and commercial cleaners. Get ready to restore your oven’s sparkle with ease.
When and Why You Should Clean Your Oven
Regular oven cleaning, ideally every three to six months or as needed, is essential for several reasons:
- Grease, fat, and grime buildup can contaminate food, impacting flavor and posing potential health risks.
- Stuck-on food residue can cause smelly smoke and negatively affect the taste and aroma of foods being cooked.
- Maintaining a clean oven ensures that it is always in a “ready-to-cook” condition.
3 Easy Ways To Clean Your Oven
There are three ways to clean the oven depending on the cleaners that you use and the level of dirt buildup in your oven: 1) using the “self-cleaning function,” 2) homemade cleaners, or 3) commercial cleaners.
If you have a self-cleaning oven, you can use this feature, especially for heavily baked-on food residue—just be aware that, because the oven gets very hot, it uses a lot of energy and can create heat and smoke in your kitchen. Another option is to use a homemade cleaner like baking soda, lemon juice, or vinegar. But for serious cleaning, you’ll probably need to use commercial cleaners like Easy-Off Fume Free Oven Cleaner, or Carbona Oven Cleaner.
How to Clean Your Oven Using the Self-Cleaning Feature
The easiest way to clean your oven is to use the self-cleaning feature. When set on the “self-cleaning” mode, the oven locks itself and produces extremely high heat to burn the grease, grime, or food residue, turning it to ash.
The duration of the self-cleaning cycle depends on your particular oven—it can take from 1 ½ to 6 hours. Check your user manual, or, if you don’t have one, search for the manual on the Web.
Step 1: Remove everything from the oven, including the oven racks.
Step 2: Select the “self-cleaning” feature on your oven. This varies for different models and brands. Again, check your user manual.
Step 3: Turn on the oven in the self-cleaning mode. It will automatically lock itself. Wait until the self-cleaning function completes.
Step 4: Once the self-cleaning cycle ends, open the oven door and let the oven cool completely. Beware: The self-cleaning cycle generates very high temperatures, so it’s crucial to make sure the oven is completely cool before moving on to the next step.
Step 5: Use a damp cloth, sponge, or paper towel to wipe up the white ash of burnt grime from the bottom of the oven. For stubborn spots, dampen the cloth with a little vinegar or soapy water.
Step 6: After removing the ash, rinse the cloth or sponge and wipe down the oven’s interior again with clean water to remove any residue. Then, dry the oven with a clean cloth.
7 Steps to Clean Your Oven Using Baking Soda And Vinegar
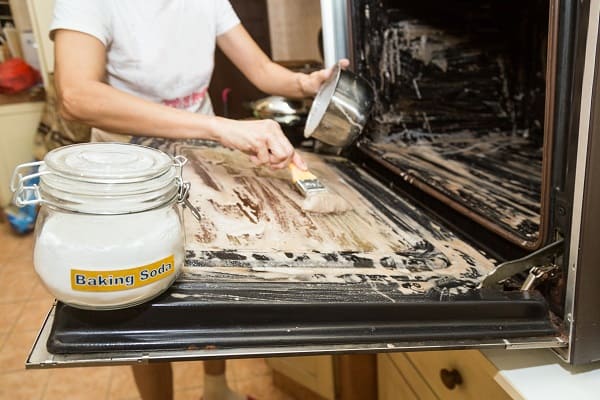
This method calls for some preparation before you start. Buy an inexpensive paint brush for application. Place some newspapers or paper towels on the floor to catch any mess. Then, make sure the oven’s power is turned off.
Step 1: Remove all items from the oven, including the racks.
Step 2: Mix ½ cup of baking soda and 2 tablespoons of water to create a thick paste which can spread on the oven surface. (You’ll need enough to cover your oven’s interior.)
Step 3: With a brush, apply a thin layer of this paste inside and outside the oven, except for the electrical heating elements and gas vents.
Step 4: Close the oven door and let baking soda work for 12 hours (preferably overnight).
Step 5: Open the oven door and wipe the entire interior and (exterior surface), using a damp sponge.
Step 6: Lightly spray the oven’s interior with white vinegar. If you see grime or food residue stuck anywhere, spray some extra vinegar on those areas, wait for 15 to 20 minutes, and then scrub away the stuck-on grime with a spatula if necessary.
Step 7: Wipe down the oven’s interior with a clean, wet sponge. Then follow with a clean microfiber cloth. Leave the oven door open so the surfaces can dry.
Pro Tip: Got badly soiled ovens? Use Pumice Stone
Pumice can help remove tough carbon deposits inside ovens. However, because they can scratch, do not use pumice stones to clean stainless steel or delicate finishes.
Before scrubbing with a pumice stone, lubricate the heavily soiled areas with water. Be gentle to avoid scarring the oven surface.
6 Steps To Clean Your Oven Using a Commercial Cleaner
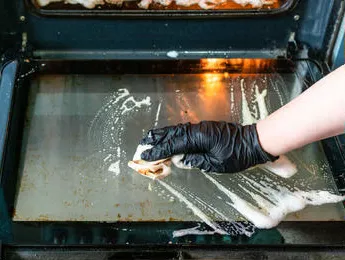
Because commercial cleaners are caustic and can cause allergies and eye problems or issues to people who have sensitive skin, take some safety precautions before you start cleaning your oven:
- Wear protective rubber gloves and safety glasses.
- Open the windows and ventilate the kitchen as much as possible.
- Turn off the power to the oven and keep paper towels handy for cleanup.
Always follow the label directions on the commercial cleaner. The process may go like this:
Step 1: Remove pots, pans, and anything else from the oven, including the racks.
Step 2: Spray the commercial cleaner on the interior of your oven. Avoid gas vents and electric heating elements.
Step 3: Close the oven door and let the cleaner work for half an hour (or per label directions).
Step 4: While waiting, use warm water and dish soap or a multi-purpose cleaner to clean the oven’s exterior. Do not use commercial oven cleaner on the oven’s exterior—it can damage the finish.
Step 5: Open the door and wipe the interior using a microfiber cloth to remove residue.
Step 6: Repeat the previous step on the oven’s exterior, using a different cloth.
Step 7: Leave the oven door open for 15 to 20 minutes or according to the oven cleaner’s label directions before using the oven.
How To Clean Oven Doors, Racks, and Knobs
While you’re waiting for the oven cleaner to break the grime and grease inside the oven, clean the racks, knobs, and doors.
Cleaning oven racks
Oven racks are often caked with the toughest stains and spills. Here’s how to clean them:
Step 1: Fill hot water and 4 to 5 drops of liquid detergent or dishwashing liquid in a large bucket or container that’s large enough to hold them. If there is excessive grime or grease buildup, add 1 cup of baking soda to the mixture.
Step 2: Soak the oven racks for 15 to 20 minutes.
Step 3: Take the racks out of the water and scrub them forcefully with a scrub brush to remove the dirt buildup.
Step 4: Rinse with clean water to get rid of the residue and wipe them with a rag.
Step 5: Allow the racks to air dry before returning them to the oven.
Cleaning oven knobs
Never spray cleaners or solvents directly on oven knobs—it could get behind the knobs and switches and short out the control panel. Instead, dampen a sponge or microfiber cloth with water and gently scrub the knobs. If the grime is tough, add 1 to 2 drops of liquid detergent or dishwashing soap to the sponge or microfiber cloth before scrubbing.
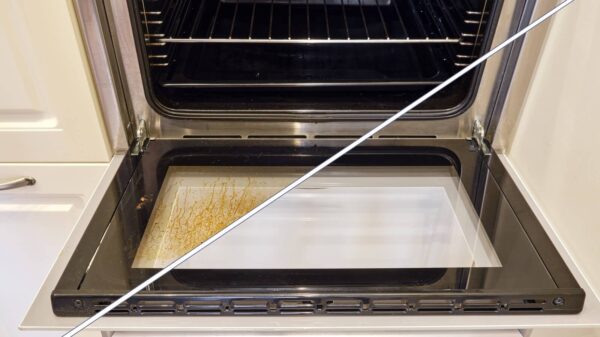
Cleaning glass oven doors
Glass oven doors require a gentle approach when cleaning to prevent them from being scratched. Don’t use abrasive sponges or scrubbers; instead, use microfiber cloths.
Step 1: Mix baking soda and water to create a thick paste, and apply this paste on the interior glass surface with your fingers or a soft brush.
Step 2: Let the paste sit for 20 to 30 minutes.
Step 3: Using a damp, non-abrasive sponge or cloth, gently scrub the paste in a circular motion. If necessary, use a razor blade at a 45-degree angle to remove tough buildup.
Step 4: Rinse with a damp cloth and wipe with a clean, dry microfiber cloth.
FAQs
Can I use a self-cleaning oven cycle to clean my oven?
Yes, self-cleaning cycles can be effective for heavily soiled ovens. However, they generate high heat and fumes, so follow your oven’s instructions carefully and make sure the kitchen has proper ventilation.
Is it safe to use oven cleaner on a stainless steel oven?
Most commercial oven cleaners are safe for stainless steel, but always check the label to be sure. Avoid using abrasive cleaners or scouring pads, as they can scratch the surface. Wipe the cleaner off gently with a soft cloth or sponge and rinse thoroughly after cleaning. If your oven has a brushed stainless steel finish, wipe in the direction of the grain (the fine lines in the metal) to avoid marring the surface.
How often should I deep clean my oven?
The frequency of oven cleaning depends on how often you use your oven and how messy it gets. A general guideline is to deep clean it every 3 to 6 months, but if you notice excessive buildup or smoke, you may need to do it more often.
Can I use a steam cleaner to clean my oven?
Yes, steam cleaners can be effective for cleaning ovens, especially for loosening grime and grease. However, they may not be powerful enough to remove heavy buildup. You can use a steam cleaner in conjunction with other cleaning methods for best results.
Reference: