Learn how compositing works with this expert reference guide, which explains the compositing process and details how it is used and its various stages.
Everything rots, given enough time and air. But to really kick start the process of breaking down organic materials, you need bugs . . . very tiny bugs.
The Role of Microorganisms
Bacteria make up 80% to 90% of the microorganisms that do the work of breaking down the grass clippings and orange peels in your compost bin. So while it may seem simple enough to just heap the debris on a pile and wait for it to change into soil, a very complex process needs to happen in order for the material to break down.
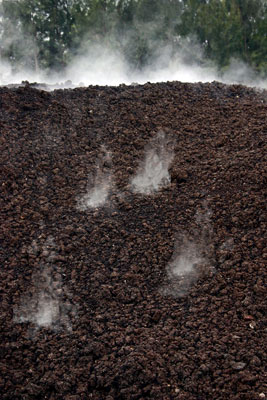
The best composting process is one that caters to the needs of the microorganisms, which means building and maintaining a bin or pile that encourages their growth. On the way to creating rich humus for your garden, the microorganisms devour the waste on a cellular level and create water, carbon dioxide, and the all-important ingredient—heat. A healthy compost pile will heat up to about 140 degrees in the core as the microorganisms do their work.
The key to good compost is understanding which of the great amounts of material around the home can be composted. Grass clippings, leaves, brush, spent flowers, vegetable plants after harvest, and wood ash all are fair game for the compost pile.
From the kitchen, eggshells, coffee grounds, produce peelings, leftover pasta (without sauce), stale bread, and past-its-prime fruit also work well. Shifting waste to the compost bin instead of the garbage bin can greatly reduce the amount of trash you bag each week.
In total, almost 20% of the materials hauled off to landfills each year could easily have been composted at home. This would not only save on space at the dump but also reduce fuel usage for transporting the refuse, return nutrients to the soil, and reduce the amount of fertilizer you must buy and apply each year (and the environmental impact if the fertilizer is chemical-based).
While some serious composting experts include meat, bones, and fat in their bins, these advanced ingredients could attract critters, bugs, and odors most novice composters would rather not deal with. Many municipalities have ordinances against backyard composting for this very reason, so, before beginning, be sure to check the local laws.
What You Can Compost
The key to good compost is understanding which of the great amount of material around the home can be composted. Grass clippings, leaves, brush, spent flowers, vegetable plants after harvest, and wood ash all are fair game for the compost pile.
From the kitchen, eggshells, coffee grounds, produce peelings, leftover pasta (without sauce), stale bread, and past-its-prime fruit also work well. Shifting waste to the compost bin instead of the garbage bin can greatly reduce the amount of trash you bag each week.
In total, almost 20% of the materials hauled off to landfills each year could easily be composted at home. This would not only save on space at the dump but also reduce fuel usage for transporting the refuse, return nutrients to your soil, and reduce the amount of fertilizer you must buy and apply each year (and the environmental impact if you’re prone to buying chemical fertilizer).
While some serious composting experts include meat, bones, and fat in their bins, these advanced ingredients could attract critters, bugs, and odors most novice composters would rather not deal with. Many municipalities have ordinances against backyard composting for this very reason, so before beginning, be sure to check the local laws.
Stages of Composting
The process of breaking down materials happens in three stages. During each of these, you can help speed up the process.
When the materials are first heaped together in a compost bin or pile, they begin the mesophilic stage. During this time the temperature of the core will begin to rise and microorganisms will start to form colonies and multiply within the pile. To help encourage this process, make sure that everything you added to the pile is broken down into small chunks. The more surface area available to the bacteria, the faster they will break it down.
The mesophilic stage lasts for less than a week ,and during this time you should see your compost “sag,” or settle. When this happens you are just about to start the next chapter of the composting saga.
The second stage is the thermophilic phase, where things really heat up. This stage sees your compost getting up to that 140-degree temperature mark. When organic materials reach that level of temperature, seeds from weeds are killed, harmful bacteria die off, and the pile starts to break down rapidly. The thermophilic phase can be assisted by making sure that your compost pile is damp (some suggest it should be as wet as a wrung-out sponge) and that there is sufficient air reaching the core of the pile.
Turning the pile once or twice during this stage will help get oxygen to the center, and turning the garden hose on the pile will supply enough water to keep the heat in. This stage can last up to three months depending upon how much attention you pay to the heap, what you are trying to compost, and what sort of bin or pile you are using.
The final stage of composting is known as the cooling stage (not nearly as scientific sounding) and this is where the final humus matures and the pile settles into a uniform mix. This can take up to 4 months, but you know your compost is ready to use when it is a rich brown color, earthy smelling, free of large pieces of debris, and has a crumbly consistency. Turning occasionally is important, and during this final stage you may want to begin a second compost location and refrain from adding to the near complete one.
How to Make Compost for Your Garden
Mature compost can be used on flowerbeds, gardens, hedges, and bare spots in the lawn. Composting neutralizes any fertilizers, pesticides, and herbicides you might have applied, so it is safe to use in almost every application.
You should be able to rotate out your compost every six months, which means you will have a steady supply of rich humus for your property, and also an ongoing solution to yard waste. So, if you are sold on the idea of composting, you simply have to pick which method you want to use.
Composting Methods
There are three basic methods used for composting; you should choose the one that best fits your lifestyle, the amount of waste material you generate, and how long you want to wait for the finished product. The three primary methods are bins, heaps, and tumblers.
Compost bins. If you can measure, saw, and nail, you can build the perfect composting bin to your specifications—and it’s a great way to use up short pieces of lumber from previous construction projects. Or, for between $50 and $100, you can purchase a composting bin in a range of sizes and materials.
The basic design for a compost bin is a box with air slits on the side, but bins made of wire mesh also work well, as do cinder block designs. Bins are a good choice because they provide protection from animals like rats, mice, and raccoons; they keep the compost area tidy and contained; and they allow for higher heaping, which helps increase heat by insulating the core of the pile.
Bins should be designed so that you can easily access the pile to turn and easily remove the final product. If you decide to go the bin route, build two and place them side by side. This will allow you to establish one bin and get it to the cooling/maturation stage, then start the second one. Just like when making sourdough bread, use a few shovels full of the cooling compost as a “starter” for your new bin and watch how quickly your clippings break down.
Compost heaps. If you are looking for the easy path to composting, there’s nothing more basic than the heap method. Simply put, you just dump your clippings and kitchen scraps into an out-of-the-way spot downwind of the home and let nature take its course.
However, the heap method takes longer because less heat is generated due to the lack of enclosure. This may be problematic if you want to use your compost on your vegetable garden because the end product won’t be as sterile as with the bin method. Still, pile composting can be successful if you don’t generate that much waste and have plenty of time to wait.
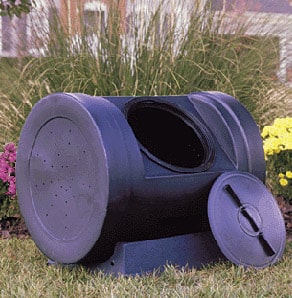
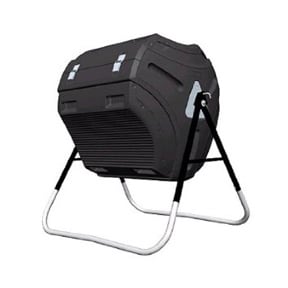
Compost tumblers. If you are looking for the cleanest way to compost, or if you are limited in backyard space, compost tumblers are the way to go. Looking similar to a small concrete mixer, tumblers are compact, easy to operate, pest resistant, and produce high-grade compost in less time than traditional bins.
The downside to using tumblers is that they can’t handle that much material and are most effective when the refuse is added all at once. This means that you may have to save up a few rounds of lawn clippings, depending upon the size of your yard, before you have enough to get a strong batch of compost going.


 Don Vandervort writes or edits every article at HomeTips. Don has: