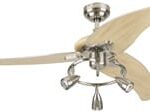
You’re probably reading this because your ceiling fan doesn’t work, making it pretty worthless on a hot day. This article will show you how to repair a ceiling fan, saving you time and money. It includes how to recognize the sources of different ceiling fan problems and fix them in a hurry.
A ceiling fan can stop working properly for a variety of reasons. We show you how to deal with a fan that doesn’t work at all because it isn’t receiving electrical power. Then we move on to other types of fan problems, such as wobbling, humming, and failure to turn properly.
TOOLS AND MATERIALS REQUIRED
| TOOLS | Safety glasses, drill, screwdriver, hammer, nails set, saw, chisel, countersink bit, voltage tester, small flat screwdriver, wire nuts, wrench, pliers, permanent marker, wire nut, non-contact voltage detector, electrical tape |
| MATERIALS | Light switches, ceiling fan controls, ceiling fans, replacement fan switch, replacement ceiling fan capacitor, anti-hum fan control, replacement flywheel, packing material, fan-rated electrical box, lag screws, U-bolts, blade tips, replacement fan blades |
Note: This article is about paddle-style ceiling fans. For information on kitchen and bathroom ventilation fans, please see How to Repair a Bathroom or Kitchen Fan Yourself.
How a Ceiling Fan Works
A ceiling fan makes a room more comfortable at higher temperatures during the summer. Because it stirs up a breeze in a room, you can set the room’s thermostat 5 to 7 degrees higher, dramatically cutting your air conditioning bills.
And, in the winter, a ceiling fan can be reversed to circulate rising warm air. By doing this, warm air that would otherwise collect and at the ceiling can be pushed back down into the room for comfort.
Parts of a Ceiling Fan
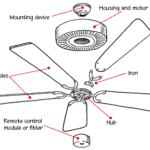
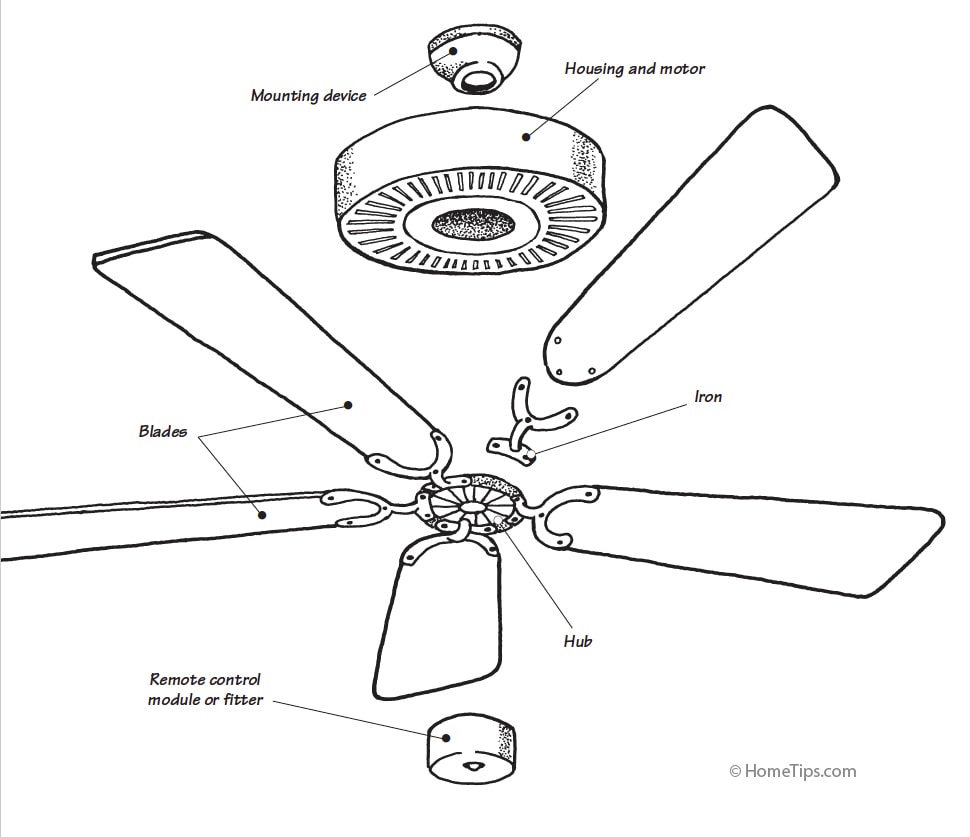
A ceiling fan consists of a few basic parts, namely an electric motor with a housing, blades and the “irons” that hold most types of blades in place, and a downrod or other mounting device.
In addition, many fans are designed to receive decorative “fitters” beneath the blades that hold lamps and glass or crystal shades. Some have a control that is wall-mounted or a hand-held remote.
For a more in-depth discussion of the working parts, see How a Ceiling Fan Works.
About Ceiling Fan Makers
The lion’s share of fans are sold by a few companies, including Hunter, Casablanca, and Emerson. Many others import or distribute fans under a variety of labels.
Most fan parts and pieces come from a few sources in China. This is why fans offered by competing companies often look similar. Many American companies import, repackage, and distribute these components. The best gauge of quality is solid warranty.
Okay, let’s get to fixing your ceiling fan!
Browse Materials for This Project on Amazon
• Light Switches
• Ceiling Fan Controls
• Ceiling Fans
Ceiling Fan Doesn’t Work At All
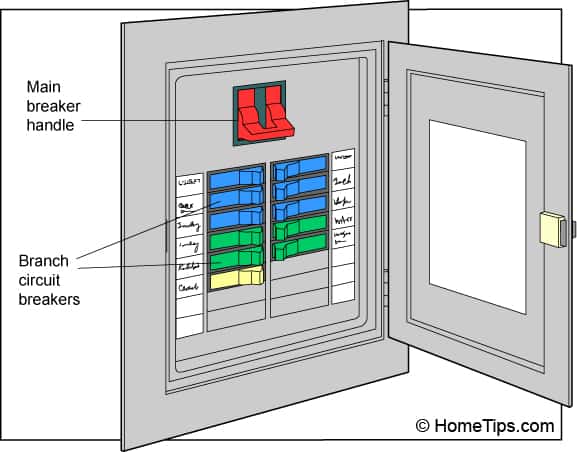
Be sure to turn off the fan’s circuit breaker before disassembling the fan or its switch!
These are instructions for troubleshooting a fan that is completely dead. In other words, it doesn’t hum or try unsuccessfully to spin. You flip the switch, and nothing happens. Zero. Zilch.
Solutions to other problems are further down the page.
When a ceiling fan doesn’t work at all, the first thing to do is to make sure it is receiving electrical power from its switch and from your home’s circuit breaker or fuse box.
First check the circuit breaker or fuse, then the switch. Find the electrical panel that serves the ceiling fan’s circuit. This circuit will often be the same one that serves ceiling lights in the same room or area. Look for any circuit breaker that has flipped. If you find one, flip it all the way off, and then back on—this is how you reset a breaker. Then retry the ceiling fan.
If that doesn’t work, move on to test whether or not the switch that controls the fan is defective.
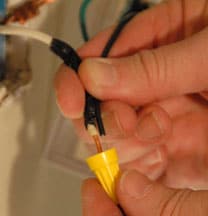
The switch is essentially a gate that opens and closes to interrupt or complete the black (“hot”) wires’ circuit. So the idea is to complete the circuit without the switch to see if it works. You do this by removing the switch, twisting together the bare ends of the black wires, and screwing-on a wire nut to secure them. If the fan works when you do this, the problem is the switch, which you simply replace.
Here’s how:
1 Turn off the power to the fan circuit at the circuit breaker panel.
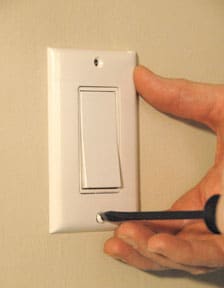
2 Remove the switch’s cover plate and unscrew the screws that mount the switch to the electrical box.
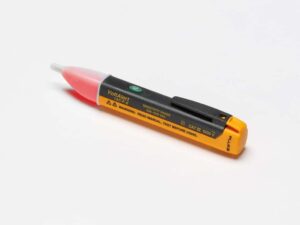
3 Use a voltage tester to check the screw terminals on the side of the switch. Make sure they’re not “hot” (electrically charged). When you’re sure, gently pull the switch and wires out from the box.
(For more information about how to safely test for a charged electrical circuit, please see our article, Electrical Wiring Problems.)
4 Unscrew the wires from the switch’s terminals. If the wires are poked into holes in the back of the switch, push a very small, flat screwdriver into the rectangular slots next to the wire holes to release the wires.
The ground wire should be green or bare—this does not carry an electrical charge. The one or two black wires that connect to the switch, on the other hand, do carry a charge when the power is on. (In some cases, a white wire that’s connected to the switch terminal is wrapped with black electrical tape to indicate that it is a substitute for a black wire.)
5 Turn the circuit back on. If the fan goes on, the switch is defective. In this case, just buy a replacement fan switch and install it. You might want to investigate some of the optional types of switches available, from timers to Wi-Fi controlled switches.
If the fan still doesn’t work, the problem is in the wiring or the fan fixture.
6 Turn off the power to the circuit again. Reconnect the existing switch, and put the cover plate back on.
The next step is to check the fan fixture or call an electrician.
Ceiling Fan Blades Don’t Turn Properly
Most often, if the fan can be turned on but the blades don’t spin, only run at one speed, or change speeds unexpectedly, the fan’t capacitor is defective or going bad. See “How to Replace a Ceiling Fan Capacitor,” below.
If the fan’s light works and/or you can hear a noise in the fan when you click the remote or switch, you know it’s getting power and that the switch works. Flip the “Forward—Reverse” switch (shown in the video below) several times, and then lock into “Forward” position and try again.
If that doesn’t solve the problem, be sure the dip switches on the receiver in the fan and the remote control are both set to the same frequency (you may have to search your fan’s manual online to do this).
If the blades do not move when you push them by hand and it’s a new fan, packing material may be jamming it. If it’s an older fan that worked before, a screw or part may have come loose and jammed it.
How to Replace a Ceiling Fan Capacitor
Most fans have a “start capacitor” that gives them the boost they need to start turning. If this capacitor burns out, it must be replaced or the blades won’t turn or will turn improperly.
Changing the ceiling fan start capacitor is easier than it sounds, as shown in the following video. When you go to a home improvement center to buy the replacement, take the old capacitor (or a photo of it). It’s very important that you can get a matching replacement. Be sure to turn off the electrical circuit before disassembling the fan!
Last, the motor could have burned out, in which case you’re probably best off buying a new fan. See our Ceiling Fan Buying Guide.
How to Fix a Fan That Hums
If your ceiling fan makes a humming noise when it runs, you may be able to eliminate the problem by changing the control. This is a relatively easy fix, but it may not work if your fan has a very cheaply made motor—the motor may be shot.
Be sure to buy a control compatible with your fan that has an anti-hum feature. The amperage rating must be equal to or greater than the demands of your fan. Multiple fans or fans with lights may require special controls.
1 Turn off the power to the fan at the circuit breaker.
2 Check the fan’s switch to be sure it’s off.
3 Remove the faceplate and the switch. Use a voltage tester (see above) to be sure the wires connected to the fan switch are not “hot.”
4 Disconnect the wires from the switch.
5 Straighten the ends of the wires in the electrical box and twist them together with the wires of the new anti-hum fan control.
6 Add wire nuts, screw the control to the electrical box, reattach the faceplate, and then restore the power.
Browse Materials for This Project on Amazon
• Voltage Testers
• Ceiling Fan Controls
• Ceiling Fans
How to Fix a Fan That Wobbles
Though a little wobble is typical for ceiling fans, significant wobble can be dangerous. Begin by checking for the source of the wobble. In many cases, wobble happens when a fan has been hung from a regular ceiling electrical box instead of an electrical box that’s rated for fans. Because of its weight and constant movement, a fan exerts far more force on the electrical box than does a light. If a fan works its way loose, it could come crashing down.
1 Unscrew and lower the bracket housing at the ceiling. Check the electrical box for a label that designates it as a fan-rated box. Also check to see how it’s fastened. U-bolts or lag screws should connect the metal box to a bracket or solid wood block in the attic.
2 Check the fan’s support. If the fan hangs from the wrong type of box or is clearly under-supported, please see our article, How to Install a Ceiling Fan.

If the work involved appears to be beyond your abilities, call a fan repair pro or an electrician.
Note: If you can’t determine the type of support from below, you may have to climb into the attic to check it. , Before you do this, follow steps 4 through 7 to see if these easier steps solve the problem.
3 Wiggle the support bracket. If it isn’t firm, tighten it.
4 Check the drop rod. If your fan hangs from a drop rod, as most do, be sure the ball joint at the top of the drop rod is properly engaged with the fan support bracket.
5 Check and, if necessary, tighten all bolts and screws.
6 Measure to see if the blade tips hang an even distance from the ceiling. If they don’t, one or more of the blades may be bent or warped. Report this to the manufacturer. Most fan makers offer replacement fan blades.
How to Replace a Fan’s Flywheel
A flywheel is a rubber disc that attaches the ceiling fan motor’s shaft to the blades. The rubber helps minimize vibration in the blades, but over time the material can crack and break.
If the fan stops turning but the motor continues to hum, you probably have a damaged or broken flywheel. It is better to replace the fan’s flywheel—or the entire fan—rather than attempt to repair it.
Replacement flywheels are relatively inexpensive and are available for most ceiling fan models. Determine which make and model ceiling fan you have. If this is not immediately apparent, remove the broken flywheel and measure it carefully. Make sure to note the inside and outside diameter and locations and spacing between bracket and screw holes.
Then find a replacement through a licensed retailer or appliance parts house—or search the part online.
To remove the broken flywheel, you must disassemble the fan assembly.

It’s helpful to take pictures of the fan as you disassemble it to make reassembly easier.
Before working on the fan, be sure to turn the power off at the circuit breaker.
1 Remove the fan’s blades and open the fan switch housing.
2 Detach any switches and controls, noting how and where these were connected.
3 Disconnect any wires attached to the motor, making sure you know where to re-connect them once the new flywheel is in place. Then remove the entire switch housing with a screwdriver, wrench or pliers, depending on the model.
4 Remove the broken flywheel, making note of its exact placement on the shaft. It may be a good idea to mark the location with a permanent marker once the flywheel is removed.
5 Slide the new flywheel into place and make sure any wires are fed through the correct holes as they were with the previous assembly. Tighten any screws and replace any other parts that may have been removed in the process.
6 Re-connect any switches or controls and replace the housing. Re-attach the blades to the fan and test it.
If you feel that this repair is too much to handle, contact a fan repair pro.
NEXT SEE:
• Ceiling Fans Buying Guide
• How to Install a Ceiling Fan
• Central Air Conditioners Buying Guide
• Buying the Best Window Air Conditioner or Room AC Unit
FAQ
- What to check when a ceiling fan stops working?
When a ceiling fan stops working, the first thing to check is whether it is receiving electrical power from its switch and from your home’s circuit breaker or fuse box. Check the circuit breaker or fuse and then the switch. Ensure the circuit breaker hasn’t flipped and reset it if necessary. If the breaker is fine, test the switch by bypassing it to see if the fan works. If the fan works without the switch, replace the switch.
- How to tell if a ceiling fan capacitor is bad?
If the ceiling fan blades do not turn properly, run at only one speed, or change speeds unexpectedly, the capacitor may be defective or going bad. The start capacitor gives the fan the boost it needs to start turning. If this capacitor burns out, it must be replaced. To replace the capacitor, disassemble the fan and bring the old capacitor to a home improvement center to get a matching replacement. Make sure to turn off the electrical circuit before disassembling the fan.
- How do I troubleshoot a fan not working?
To troubleshoot a fan that is not working, start by ensuring it is receiving electrical power. Check the circuit breaker and the switch. If the fan doesn’t respond, bypass the switch to see if the fan works. If the fan is getting power but the blades do not turn, the problem might be a defective capacitor, which needs to be replaced. If the fan hums but doesn’t turn, the issue could be with the motor or the flywheel, which may need to be replaced.
- How do I get my fan to work again?
To get your fan to work again, first check the power supply, including the circuit breaker and the switch. If the fan is not getting power, reset the circuit breaker or replace the switch. If the fan is getting power but still not working, check the capacitor and replace it if necessary. For fans that hum but don’t turn, inspect the motor and the flywheel, replacing any faulty parts. Ensure all connections are secure and all parts are properly installed.




 Don Vandervort writes or edits every article at HomeTips. Don has:
