An in-depth guide about chimney cleaning and DIY chimney repairs. Covers inspection, sweeping, fixing the chimney cap, and repairing flashing.
Maintain your chimney to keep it performing efficiently and preventing it from becoming a fire hazard.
Inspect your chimney at the beginning of each heating season—or, better, have a professional chimney sweep inspect it.
How to Inspect a Chimney
Shine a flashlight up inside and look for obstructions such as leaves or birds’ nests; also check for soot buildup.
Burning highly resinous wood such as pine will cause flammable creosote (a sap-like material) to build up on the inner walls of the chimney. Also look for any missing or cracked flue tiles.
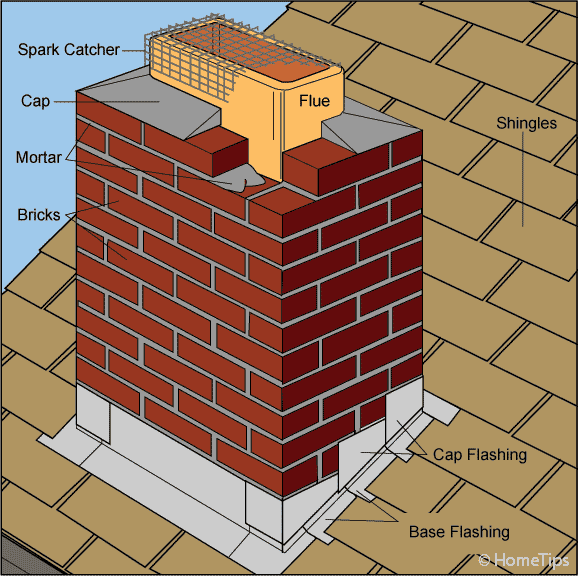
From the outside or on the roof, look for crumbling mortar, loose or missing bricks, or flashing that has pulled away from the roof and the chimney.
If you live in earthquake country, check your chimney for cracks after noticeable temblors. Some cracks are harmless, but others may need to be repaired to prevent them from becoming a fire hazard.
Get a Pre-Screened Local Chimney Cleaner or Inspector
How to Sweep a Chimney
Cleaning a chimney is a messy job, but it ought to be done regularly to remove built-up creosote and soot, which can catch fire or obstruct the air flowing through the chimney. Restricted airflow can cause a fireplace to operate poorly and sometimes cause soot and ash to blow back into the house.
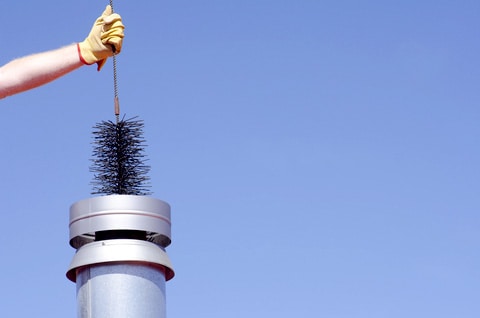
It’s often wise to hire a chimney sweep for this job, but you can do it yourself if it’s possible for you to work safely on the roof and you can reach the top of the chimney.
You’ll need:
• A steel chimney-sweeping brush
• A rope the length of the flue and the chimney
• A water-filled plastic jug to serve as a weight for the brush
• A heavy-duty vacuum cleaner
Tape plastic sheeting across the mouth of your fireplace. Use old sheets or dropcloths to protect nearby rugs and furnishings. Plan to wear a dust mask, gloves, and goggles to protect yourself from the dust, ash, and soot.
Carefully climb onto the roof and, if the chimney has a cap or spark catcher attached to the top, remove it. Tie the water-filled jug to the bottom end of the chimney brush and the long rope to the top end.
Lower the weight and brush down into the chimney, all the way to the bottom, and then pull it back up. Pass it through several times until it comes up relatively free of debris. Let the dust settle, and then return back inside and vacuum out the soot and debris that has fallen into the fireplace.
Do-it-yourselfers may prefer to sweep the chimney from below, instead of going onto the roof for the job. This video shows how you can do this.

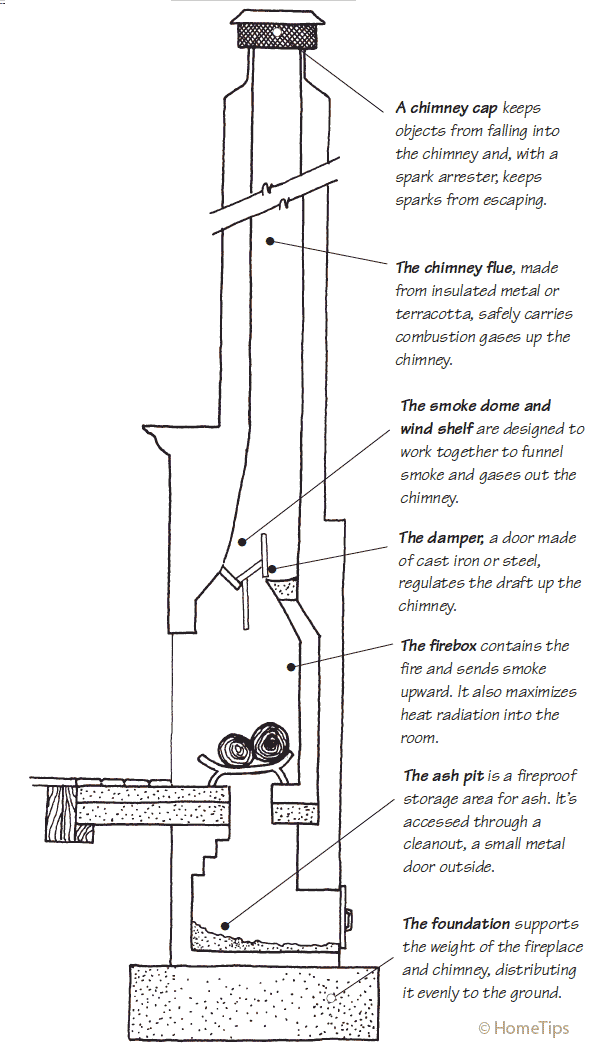
If you have an open fireplace and your chimney isn’t equipped with a damper, costly heated air is being drawn out through the chimney every day. Have a mason install a damper inside the chimney, or mount a special chimney cap on top that includes a damper.
How to Fix Chimney Cap
Mortar chimney caps are sometimes vulnerable to cracks along the joints because the mortar shrinks, causing the joints to open. Lime-based mortar decays over time and may crumble. Minor cracks and the joint between the flue and the cap can be sealed with masonry caulking compound.
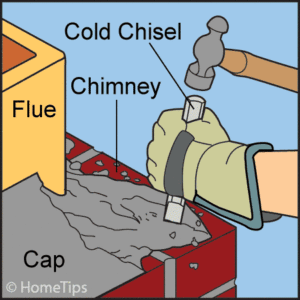
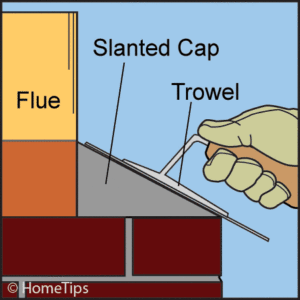
If the cap is crumbling, you’ll have to chip out the old deteriorating mortar using a ball-peen hammer and a cold chisel. Be sure to wear gloves and goggles. Brush off any loose debris. Then apply a new layer of ready-mix mortar using a trowel. Slope it away from the flue so that rain will drain off properly. Keep the mortar damp for four days to allow it to cure.
To repair mortar around the bricks, remove the old mortar and pack the cracks with new, weather-resistant ready-mix mortar.
Renew flashing seals by chipping out the old mortar. Caulk along the edges of the flashing, and caulk the joints between the flashing and the chimney.
One source of attic-to-home air leaks is the space surrounding your chimney. Chimneys often extend into attics through framed bypasses, and, if these are not properly insulated and sealed, air will escape.
Fill gaps in these areas using unfaced rockwool insulation batts or a similar fireproof material. Seal up where the chimney and the framing meet with furnace cement or a caulk that can withstand high temperatures.
How to Repair Chimney Flashing
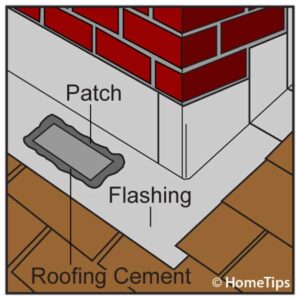
First roughen the area around the hole with a wire brush or sandpaper, and then clean it. Cut the patch larger than the hole, affix it with roofing cement, and then cover the patch with more roofing cement, as shown below.
Flashing that is badly corroded will need to be replaced. You will have to remove several rows of shingles as well as the old flashing to do this. Consider whether you have the skills; otherwise, call a roofing contractor.
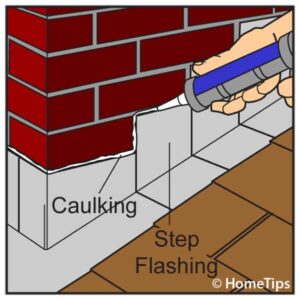
Renew flashing seals by chipping out the old mortar and caulking along the edges of the flashing. Use special masonry caulk to seal the joints between the flashing and the chimney.
Seal the seam between the cap and step flashing with urethane roofing cement or silicone caulking compound, as shown below. If you are working with valley flashing, lift the edges of the surrounding shingles, and spread roofing cement on the flashing about 6 inches in from the edge of the shingles.
If you are resealing drip edging, seal beneath the shingles, but don’t seal the drip edge along the eaves.
NEXT SEE: Pellet Stove Repair



 Don Vandervort writes or edits every article at HomeTips. Don has:
