Do you have an electrical outlet that doesn’t work or that you want to replace? This expert guide will help you troubleshoot and, if called for, replace the outlet.
Troubleshooting an outlet that doesn’t work is fairly simple. The first thing to do is discover whether the outlet is faulty or the problem lies elsewhere.
Troubleshooting an Electrical Outlet
1 Make sure the problem isn’t with the appliance or lamp. Some appliances, such as hairdryers, have overload protectors that automatically shut them off if they begin to overheat. Look for a reset and, if the appliance has one, reset it.
If it doesn’t have one, try a second working appliance or lamp in the outlet.
2 Is the outlet connected to a switch? A typical outlet, called a “duplex receptacle” because it has two places to plug-in devices, can be connected to a switch. Be sure that one half of the duplex receptacle—or the entire receptacle— isn’t controlled by a switch in the room.
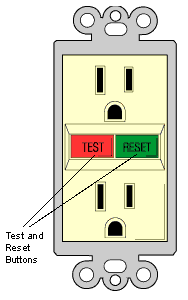
3 Determine if the outlet is a GFCI. Receptacles in the kitchen, bathroom, or outdoors are likely to be ground-fault circuit interrupter (GFCI) receptacles. They—and other receptacles that follow them along the circuit—will shut off when they receive minor electrical grounding faults. Look for a reset between the two outlets where you plug-in devices. Also check other nearby receptacles that may be on the same circuit.
Just push the reset button to reset the receptacle—this will turn on the receptacle and any others connected to it.
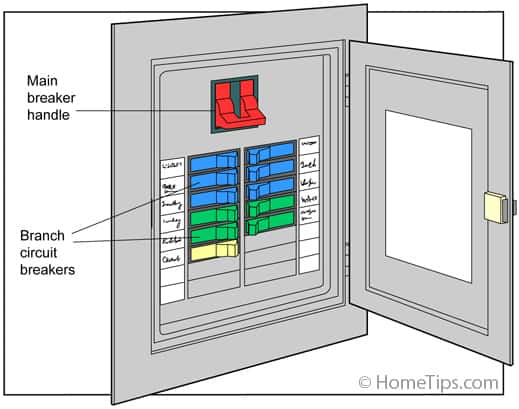
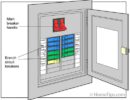
4 Check the circuit breaker (or fuse) that serves the receptacle’s circuit to be sure it has not tripped (or blown). If it has, reset the breaker or replace the fuse, and try plugging a working lamp or appliance into the receptacle again.
Be aware that a defective receptacle, switch, or appliance hooked up to that circuit may have caused the failure.
For more about how to reset a circuit breaker or replace a fuse, see How to Turn Off Your Home’s Electricity.
5 If the receptacle still doesn’t work, turn off the receptacle’s circuit breaker (see above), unscrew the cover plate from the receptacle, and use a voltage tester to be sure none of the wires in the electrical box are still “hot.” Then check to be sure that the wires are securely fastened to the receptacle’s terminals.
See How to Safely Test An Electrical Circuit in the Electrical Wiring Problems article for more about using a voltage tester.
6 Look for signs of charring. A brownish or blackish stain anywhere on the receptacle indicates a burned-out receptacle. Replace the receptacle.
Finally, if you find no apparent problem and the other receptacles near the non-working one operate fine, the chances are pretty good that the non-working outlet is defective. In this case, replace it.
Because outlets are inexpensive and easy to replace, it makes sense to replace a defective one when it ceases to work properly.
For large 220- to 240-volt outlets meant for large appliances such as ranges, dryers, and air conditioners, call an electrician unless you’re well-versed in electrical repairs and safety issues. Always check when installing if the appliance is rated from 15 to 50 amps, 240 volts, and 20 to 50 amps, 120/240 volts. They have two hot wires (red and black) and a separate grounding wire.
How to Replace an Electrical Outlet
First buy a replacement. Be sure you get a replacement receptacle that’s the correct type for your wiring. Though most receptacles are standard, aluminum wiring (uncommon but in some homes) should only be connected to receptacles designated CO-ALR.
As always when working with electricity, do not work on outlets before you shut off the power.
Use a voltage tester to make sure that the power is really off. See How to Safely Test An Electrical Circuit for more about using the tester.
This video shows the proper steps for replacing an outlet:
Properly Orienting an Electrical Outlet
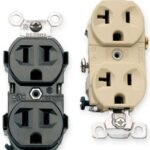
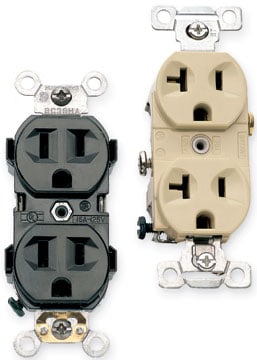
Conventional duplex receptacles have two places to plug in electrical cords or devices. Each of those two places includes one short slot, one tall or T-shaped slot, and a semicircular hole.
The short slot is the “hot” side, connected to the black wire of the electrical system.
The tall or T-shaped slot is the “neutral” side, connected to the white wire.
And the semicircular hole is the ground, connected to a green grounding screw that receives a bare or green wire (the electrical system’s ground).
Many electrical plugs have one wide blade and one narrow blade (and, in some cases, a ground plug) that match the receptacle’s slots to ensure that the circuit is properly connected to the electrical device. Do not connect the wires to the wrong side of the outlets—this will create “reverse polarity.” See below for more about this.
Connecting Electrical Wires to Receptacles
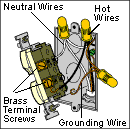
Electrical wires connect onto standard duplex receptacles using one of two methods. They may attach to screws on each side of the receptacle, or they plug straight into terminal holes in the back of the receptacle.
Whether wires attached to screw terminals or are pushed into rear-mount terminals, the screw terminals on the sides of the receptacle are hot (charged), so don’t touch them!
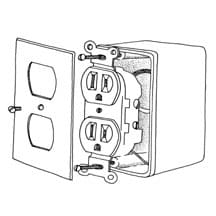
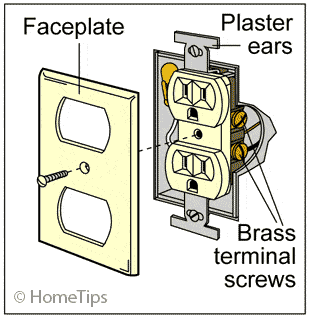
Unscrew the receptacle’s faceplate.
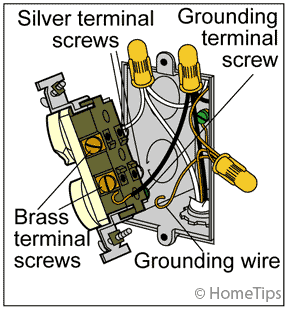
When installing the new receptacle, connect the black (hot) wire to the brass terminal screw, the white (neutral) wire to the silver screw, and the bare (ground) wire to the green ground screw.
Unscrew the receptacle cover plate and unscrew the receptacle. Disconnect the wires from the terminals. Form a curl with a pair of needle-nose pliers so the wires hook clockwise around the screws, and then tighten the terminal screws.
Screw the receptacle to the box and add the faceplate.
Reverse Polarity: Outlet Is Wired Backwards
Conventional duplex electrical receptacles are connected to three electrical wires: a black “hot” wire, a white neutral wire, and a green ground wire. As discussed above, these three wires must be connected to the proper terminals on the receptacle.
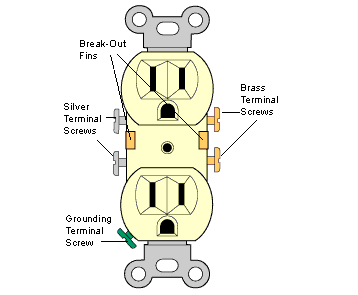
Note in this illustration of a conventional electrical outlet that the device has brass terminal screws on one side and silver terminal screws on the other side (many receptacles also have push-in terminals on the back). It also has a green grounding terminal at one end.
It is critical that only the green (or bare) electrical ground wire be connected to the green grounding terminal screw—it would cause a short circuit, a fire, or electrical shock to connect a black “hot” wire to the grounding screw.
Connecting the black or white wires to the wrong side terminals of a receptacle can create a problem.
“Reverse polarity” is the term used to describe this situation.
Though you generally don’t know the condition exists unless you look for this, it can damage certain types of electrical equipment. If you suspect your home’s wiring is a bit haphazard, it’s a good idea to check for reverse polarity.
You can buy a simple circuit tester for less than $20 that will determine if a circuit is live and has the proper polarity. Just plug it into the top and bottom of every duplex receptacle.

If you discover reverse polarity:
1 Shut off the branch circuit breaker that serves that receptacle (the tester’s lights will go out).
2 Unscrew the cover plate from the receptacle, and unscrew the receptacle mounting screws so you can pull the receptacle straight out of the box. Use a voltage tester to be sure that none of the wires in the electrical box are still hot.
3 Unscrew or release the black and white wires from the sides of the receptacle. If they are inserted in small round holes in the back of the receptacle, insert a very small, flat screwdriver into the slot next to them to release them.
Then re-fasten them to the opposite terminals—white to the silver (neutral terminal) and black to the brass (hot terminal).
Be sure the bare or green wire wire is connected to the green grounding screw.
4 Push the wires back into the box and re-mount the receptacle to the box.
Put the faceplate back on, turn the circuit back on, and test the receptacle again. If the tester indicates reverse polarity but the wires are hooked up to the proper terminals, call an electrician.




 Don Vandervort writes or edits every article at HomeTips. Don has:
