Weather stripping reduces drafts and blocks energy loss through windows and doors. The right weather stripping, when installed correctly, can pay off significantly in energy savings.
When it comes to a home’s energy loss caused by air leaks through windows, doors, and walls (called “infiltration”), old windows and leaky doors are serious offenders. If you can hear windows rattle on a windy day, feel drafts blowing, or see light between the moving parts of a window or exterior door, you can bet that expensively-heated or cooled air is departing your home. In exchange, you’re getting uncomfortable drafts in the winter and unwanted heat gain in the summer.
Even new windows and doors with integral (built-in) weather stripping may require improvement. Low-grade materials, poorly installed windows or doors, or damaged weather stripping may seal poorly. Again, the result is energy loss and drafts.
It pays to check all windows and doors for air leaks. Even if you can’t see or feel the movement of air, infiltration may be occurring. To check your for air leaks, please see How to Detect Window Air Leaks.
Weather Stripping Materials
Weather stripping is made from several different types of pliable materials. The right one to choose will depend on the particular window or door and the situation. The two main forms of weather stripping are nail-on strips and adhesive-backed self-stick tapes.
Self-Stick Weather Stripping
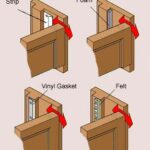
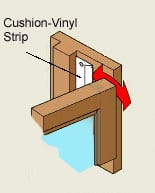
Several types of self-stick pliable-gasket weather stripping are made from non-rigid, springy materials such as foam, vinyl, felt, or sponge rubber. They have an adhesive backing for easy installation.

Self-stick weatherstripping is best where nailing isn’t possible, such as on metal or vinyl windows. It also does a good job sealing windows that are too irregular or warped for rigid weatherstripping. And it’s favored for parts of doors or windows that press together rather than sliding against one another (sliding action can quickly dislodge the self-stick backing). It works well on hinged doors and windows, though nail-on weatherstripping (below) works for these, too.
Foam weather stripping. Of the various foams and vinyl materials, EPDM (ethylene-propylene-diene-monomer) rubber weatherstripping is favored because it stays elastic and maintains its insulating qualities for many years, even when exposed to sub-zero temperatures.
High-density foam weatherstripping is also popular because of its durability—choose closed-cell foam weatherstripping for exterior use.
Compressible felt strips are the least durable option. They are best used only for warped windows that won’t accept more-rigid stripping or for windows that are not frequently opened. Compressible felt weatherstripping is generally best used only indoors because it rots quickly if it gets wet.
Garage door weather stripping requires a far larger, heavy duty product. These types of weather stripping are generally made of large, 3″-4″ flexible plastic tubes or a thick, closed-cell foam that creates a seal under the garage door.
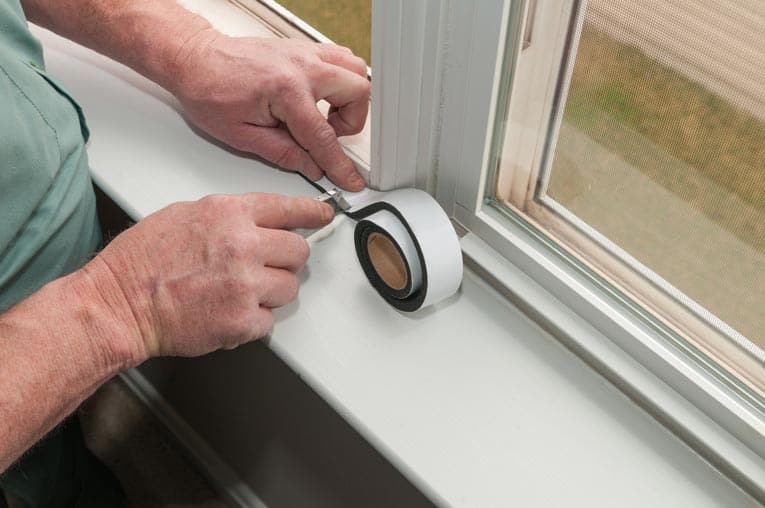
Application. Self-stick weatherstripping is very easy to use. With a solution of mild detergent, clean the surfaces where the strips will go. Then snip the weatherstripping to length with scissors. Peel off the backing, and press the strips in place.
Nail-On Weather Stripping
Nail-on weatherstripping is sold in metal V-shaped “spring” strips and tubular seals, sold in coils. Because they are nailed in place, they’re more secure than adhesive-backed strips. On the downside, they require considerably more labor for installation. The right size and type of nail-on strip to choose depends on the job.
Spring-type nail-on metal weatherstripping, made from vinyl, bronze, aluminum, or, less commonly, stainless steel, is best for sealing consistently sized gaps that are less than 1/4 inch wide. This type has a metal flange that is nailed in place, and it springs open to close the gap.
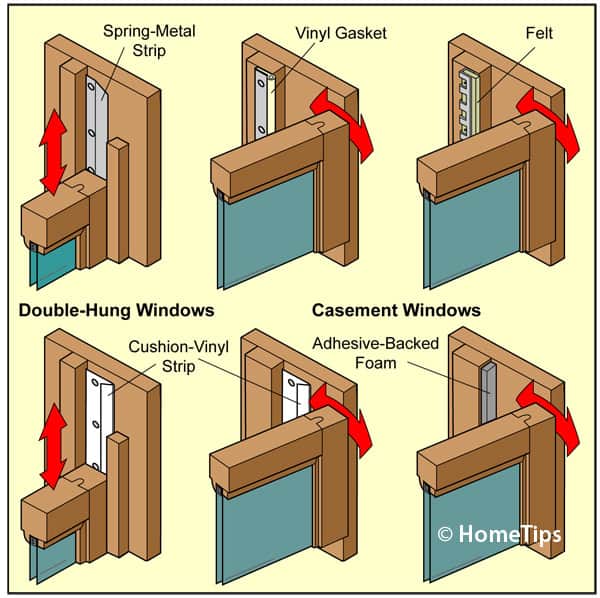
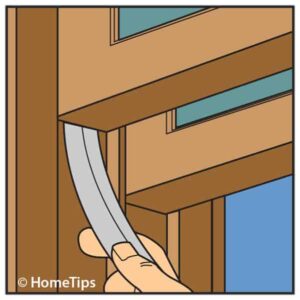
For weather stripping double-hung windows, nail-on metal weather stripping is generally considered the best option because it forms a tight seal and is well hidden in the window’s tracks. Along the sides of the window, it is nailed to the frame; at the bottom, it is attached to the sash.
Vinyl tubular weatherstripping, applied to the outside of the window, does a good job of filling large or inconsistent gaps. Metal-reinforced vinyl weatherstripping is less likely to tear than unreinforced strips. Because it is installed on the outside, it is more visible than other types.
To apply tubular vinyl, you just measure, cut with scissors or, for the type with a metal reinforcement, with tin snips. When applying, butt the tube section snugly against the window, and maintain tension on the vinyl as you fasten it to the jambs or sill with brads.
Weather Stripping Techniques
Recommended methods for weather stripping doors and windows depend on the type of door or window.
Double-Hung Window
Because of their two sliding sashes, double-hung windows are a bit more complicated to seal than other types.
Here’s how to weather strip wood double-hung windows:
1 Scrape off any chipping or loose paint and remove any worn-out preexisting weatherstripping. If necessary, reposition the sash lock so it will properly pull the upper and lower sashes together for a tight seal.
2 Measure the channels between the sashes and the window jamb, and cut the weatherstripping to fit. To do this, open the lower sash and insert a strip on the left side of the window up between the jamb and sash. Make a mark where the strip hits the window seat, and cut the strip at this point. Do the same thing on the right side of the window. Follow these directions for the upper sash, as well.
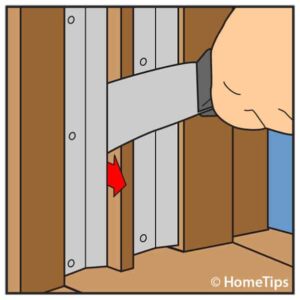
3 Reinsert the strips between the sashes and jambs, making sure the nailing flange abuts the stop, and nail them into place. If necessary, you can pry a strip slightly upward using a putty knife to ensure that the sash compresses it.
4 Lay a strip along the horizontal length of the window and cut it to size. Cut two more strips to the same length.
5 Install one horizontal strip across the bottom of the lower sash and another across the top edge of the upper sash. Be sure the nailing flange sits evenly with the window’s inner edge, and nail in the strips, being careful not to pound too hard (or you could break the window). Affix the third strip to the base of the upper sash. If necessary, you can pry the strips up slightly.
6 As a final step, you can add window pulley seals, self-adhesive caps that cover the pulley area and stop drafts. Simply clean and dry the area, and stick these in place.
Sealing a Casement Window or Hinged Door
To seal casement windows, you will need to apply weatherstripping around the window jamb, right beside the stops.
Use vinyl V-strip or adhesive foam (closed-cell is best) on vinyl or metal windows. First, clean the stops thoroughly.
Cut the strips or foam to length so that they can run along the sides, top, and bottom of the stops, and then press the weatherstripping into place.
For wood windows, use spring metal strips. Nail the weatherstripping to the outer perimeter of the frame for casements that open outward and to the inner edge of the frame for windows that open inward.
Weather stripping a door involves additional specialty pieces. For a complete discussion, please see How to Weatherstrip a Door.
Sliding Window or Door Weather Stripping
Check out the instructions for weather stripping a double-hung window when sealing a sliding window—a slider is similar to a double-hung window turned on its side.
For sliding windows where both sashes slide, attach tubular gaskets to the tops and bottoms and spring bronze strips in both side channels. For windows that have a single moving sash, nail tubular gaskets along the sides, top, and bottom, and attach a spring bronze strip to the side channel that receives the slider.





 Don Vandervort writes or edits every article at HomeTips. Don has:
